
How to use AI to Create Tokens and NFTs with ChainGPT in Enkrypt
Did you know you can create NFTs and tokens using AI with Enkrypt? Follow our guide below for help using AI tools in Enkrypt!

ChainGPT provides AI-driven solutions tailored for the Web3, Blockchain, and Crypto sectors. By developing tools like Large Language Models and specialized Web3 AI applications, ChainGPT enhances the experience for users and startups, making it a key resource for integrating AI into the Web3 environment.
Connecting your wallet
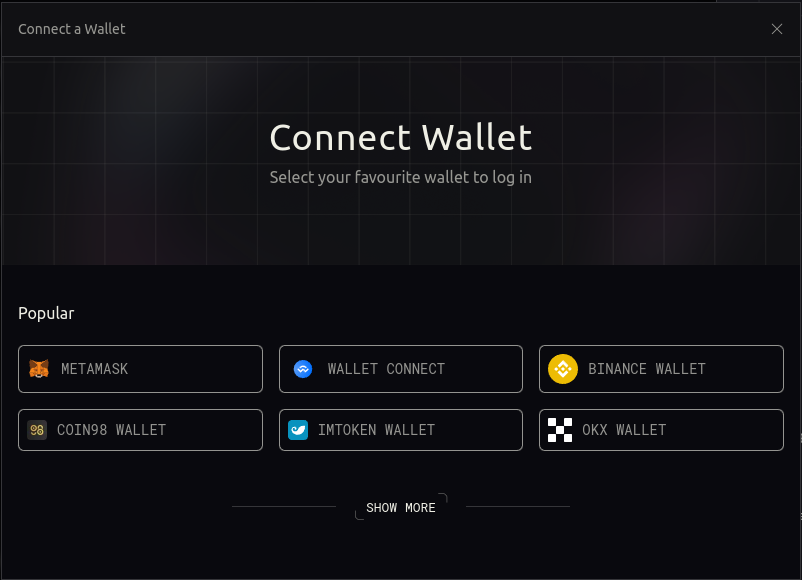
First head to the ChainGPT DApp then click ‘Connect wallet’ at the top right of the page.
Disclaimer: Keep in mind ChainGPT is a third-party AI DApp and is not affiliated with Enkrypt in any way. Using DeFi involves some inherent risk. Please do your research and proceed at your own discretion.

On the pop up, select ‘Metamask’. This works because Enkrypt is able to mimic the Metamask connection.
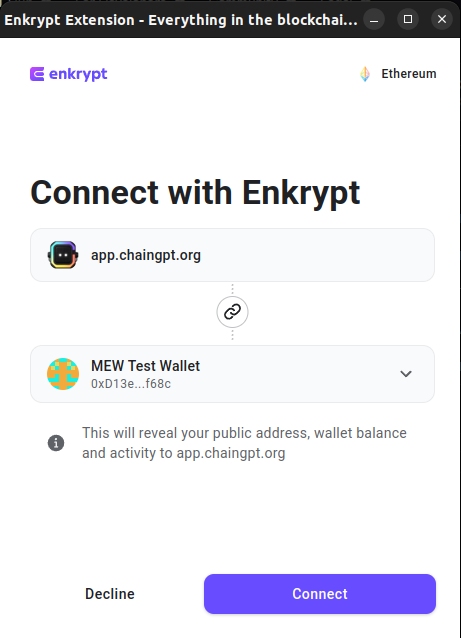
On the Enkrypt pop up, select the account you want to connect with then click ‘Connect’.
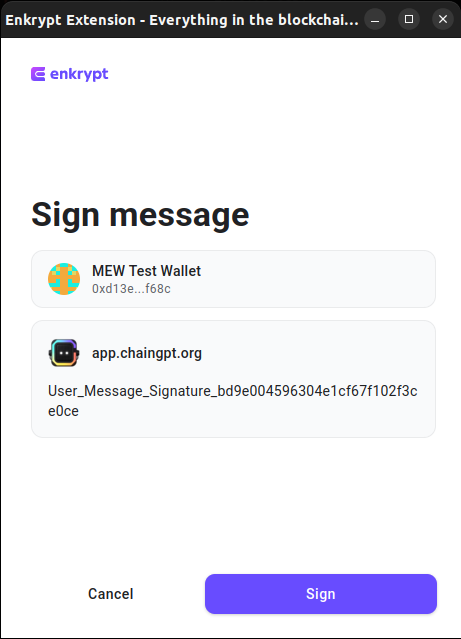
Sign the message by clicking ‘Sign’.
Your wallet should now be connected! You should see your wallet address at the top right of the page.

Get ChainGPT Credits
In order to get ChainGPT credits, you can use CGPT tokens on Ethereum or other supported networks. You can get these tokens by swapping for them directly in the Enkrypt wallet or by using an outside DEX of your choice. You can also use a credit card or a few other tokens depending on the network you are using to get credits.
Click the ‘Credits’ text at the top right of the page.

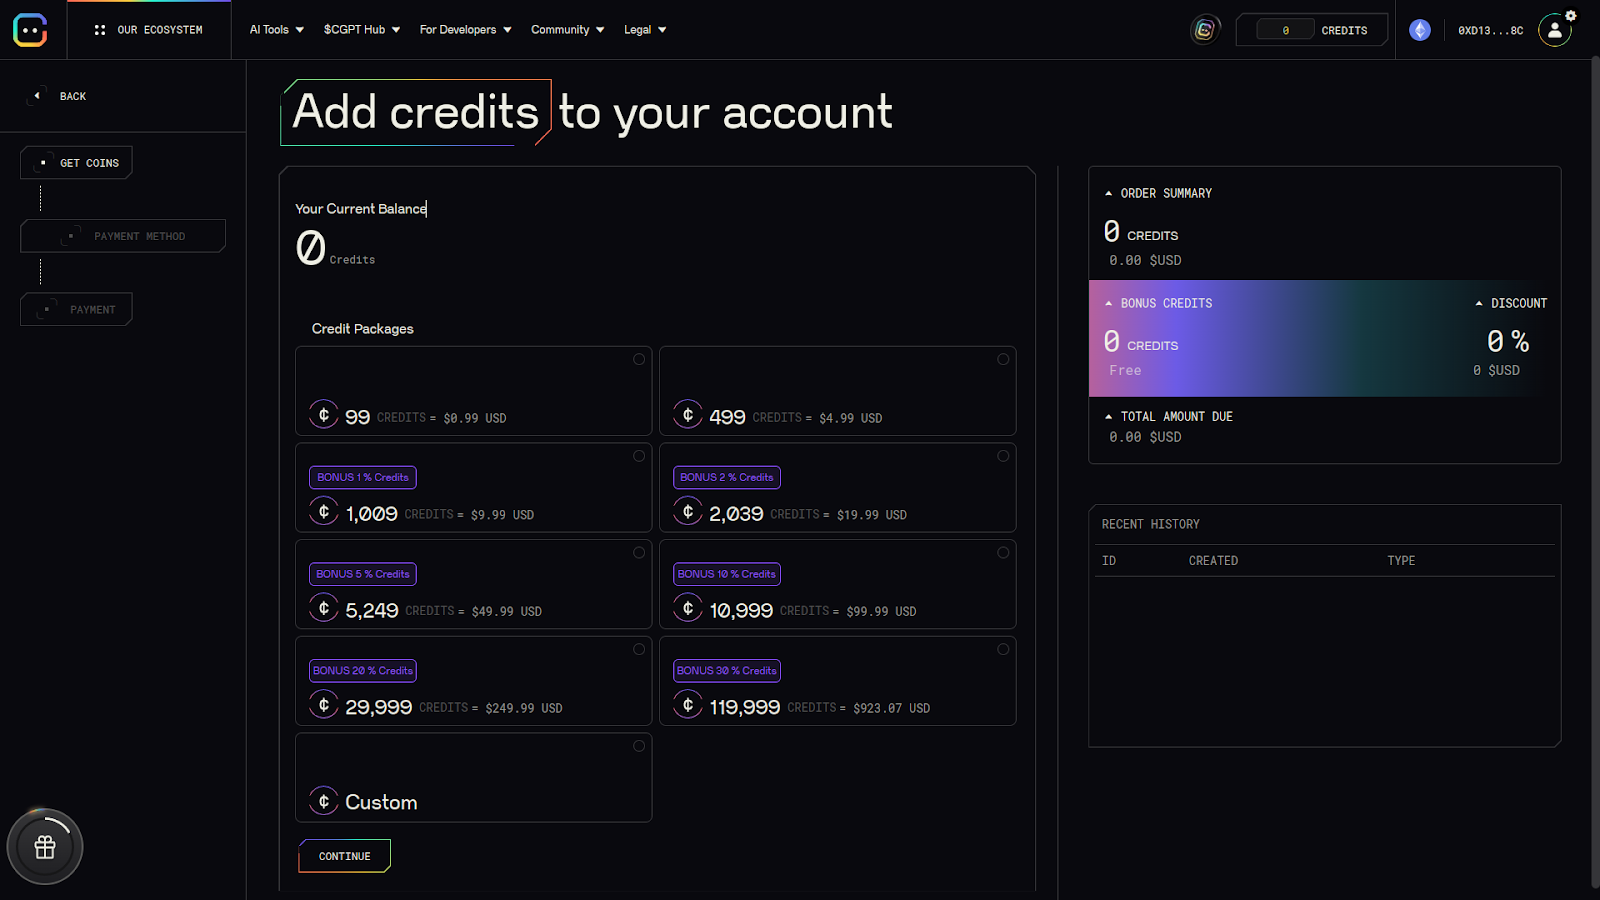
This should take you to the Add Credits page.
Select the amount of credits you want to add to your account then select ‘Continue’ at the bottom.
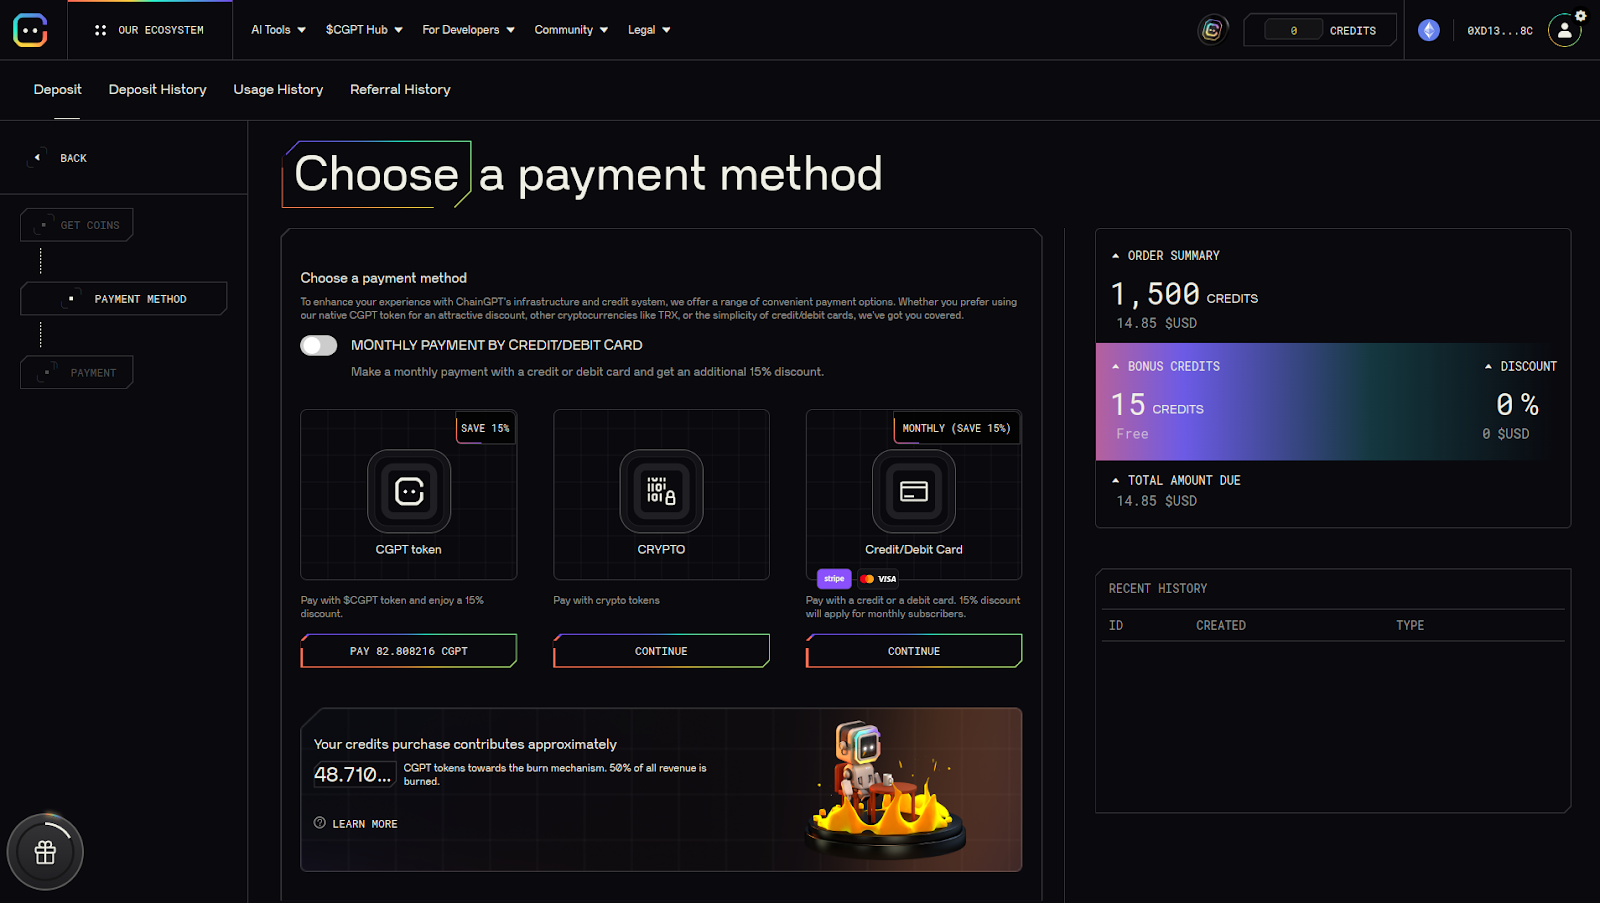
Select the option you would like to use to get your credits. We will use the ‘Pay with CGPT’ option.
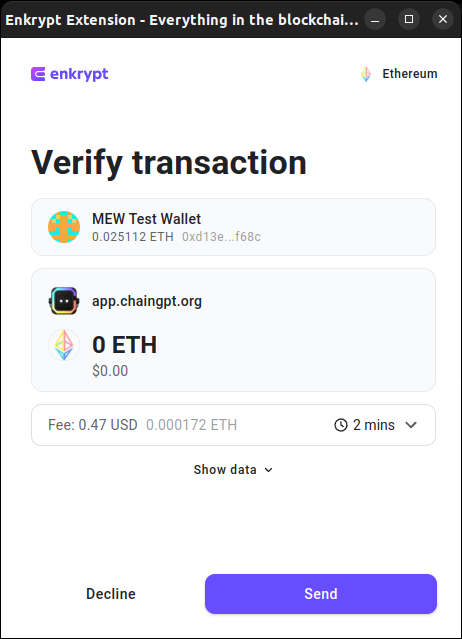
Confirm the approval transaction on the Enkrypt pop up by clicking ‘Send’.

Now confirm the swap transaction on the Enkrypt pop up by clicking ‘Send’.
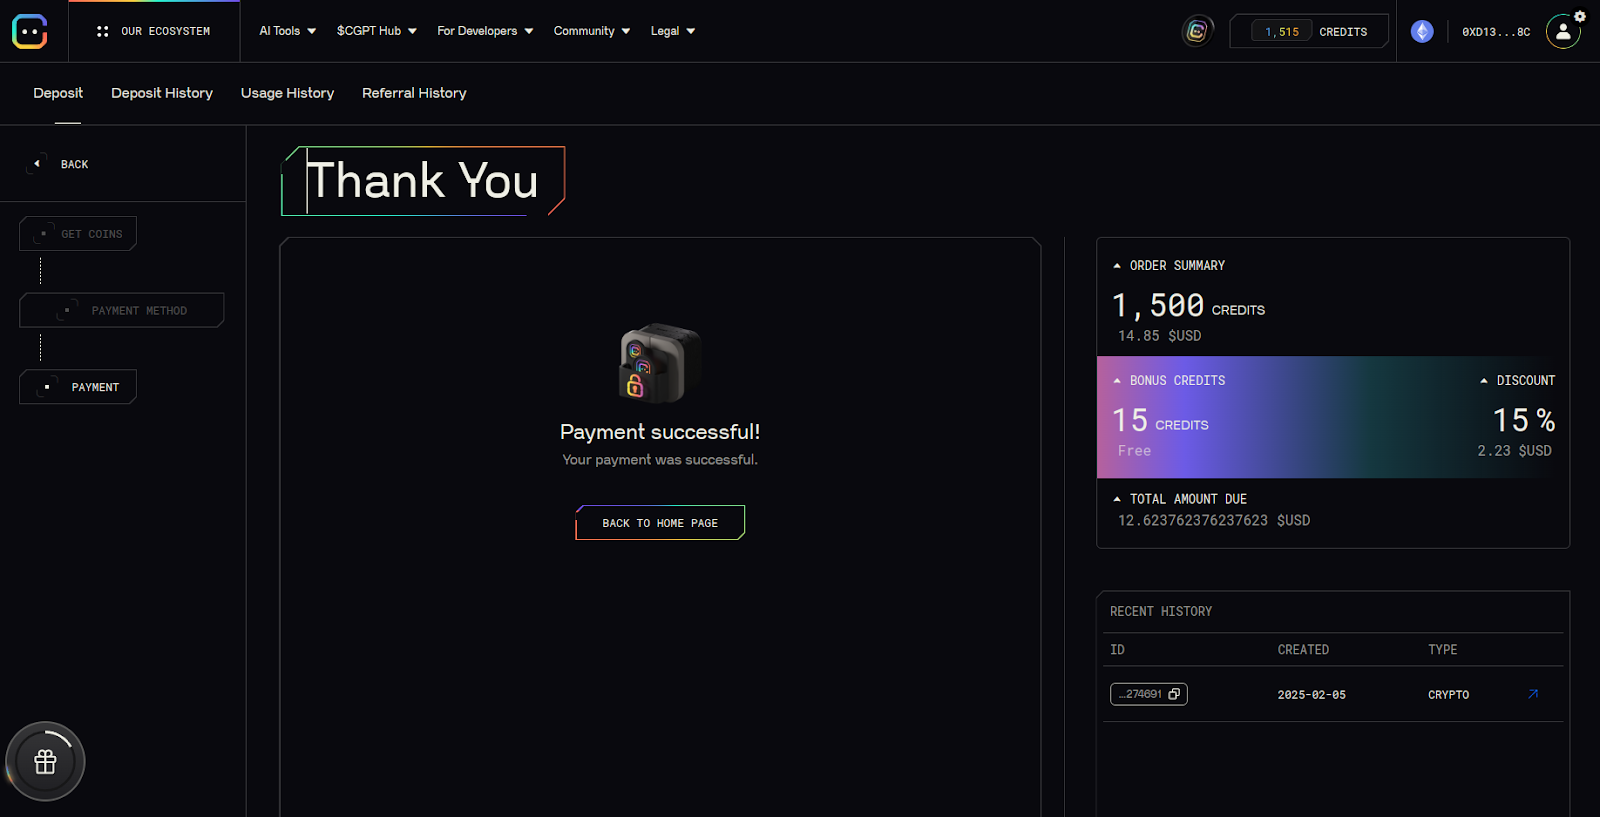
You should see that your payment was successful and your credits added to your account at the top right of the page.
Now you are ready to use AI to create tokens and NFTs!
Use AI to Create a Token
On the home page of the ChainGPT DApp, you should see the Chatbot on the right side of the screen.
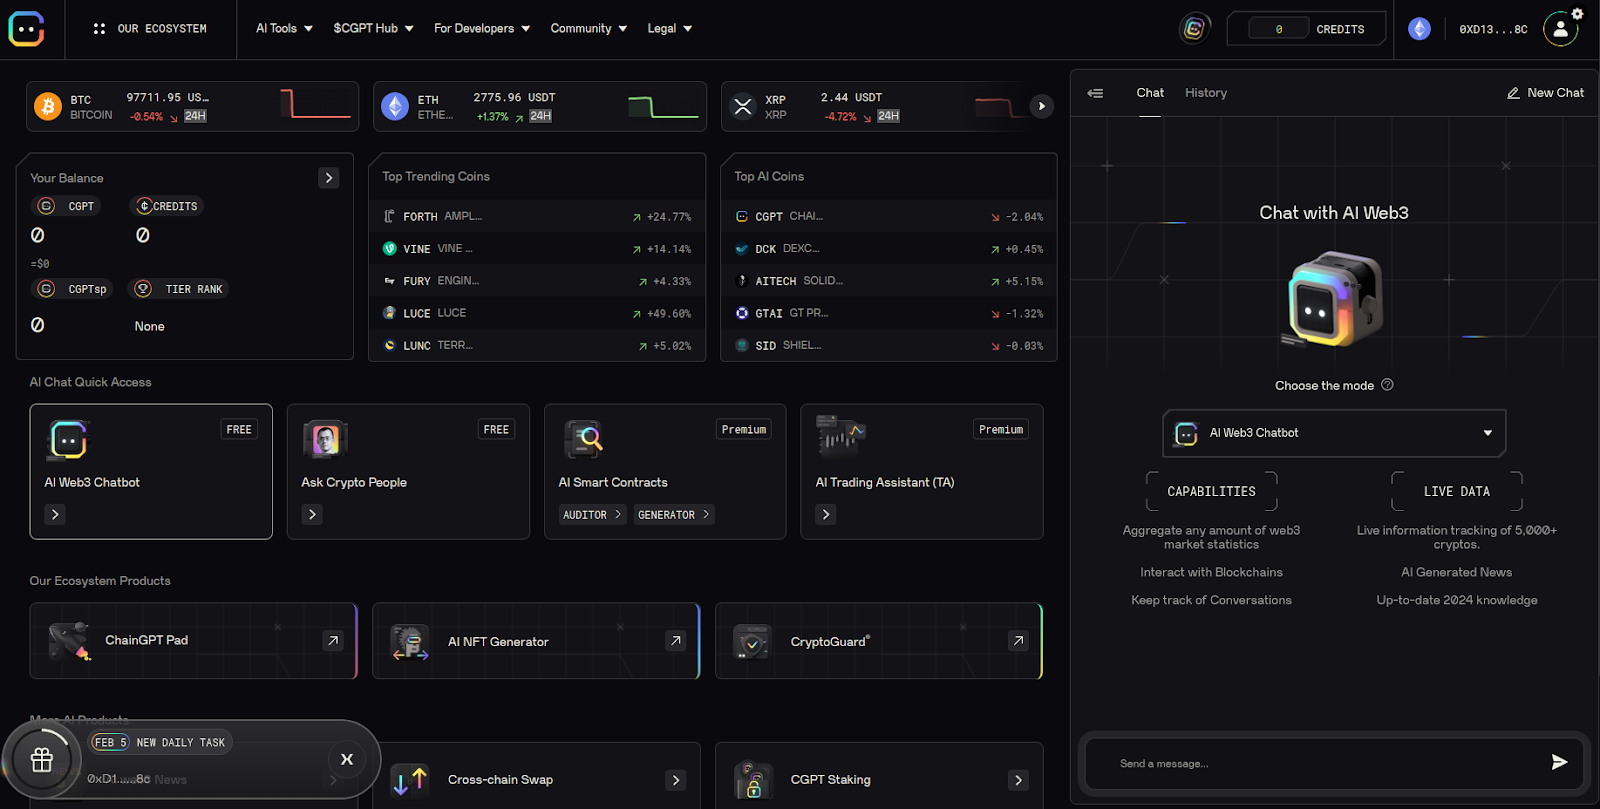
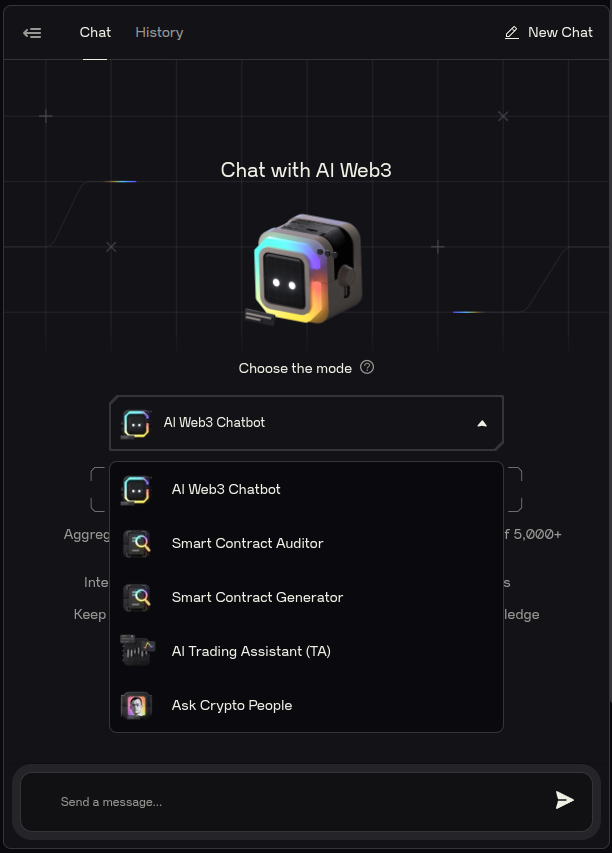
You can select the type of AI you want to use. You will need to use ChainGPT credits to use the other modes besides ‘AI Web3 Chatbot’.
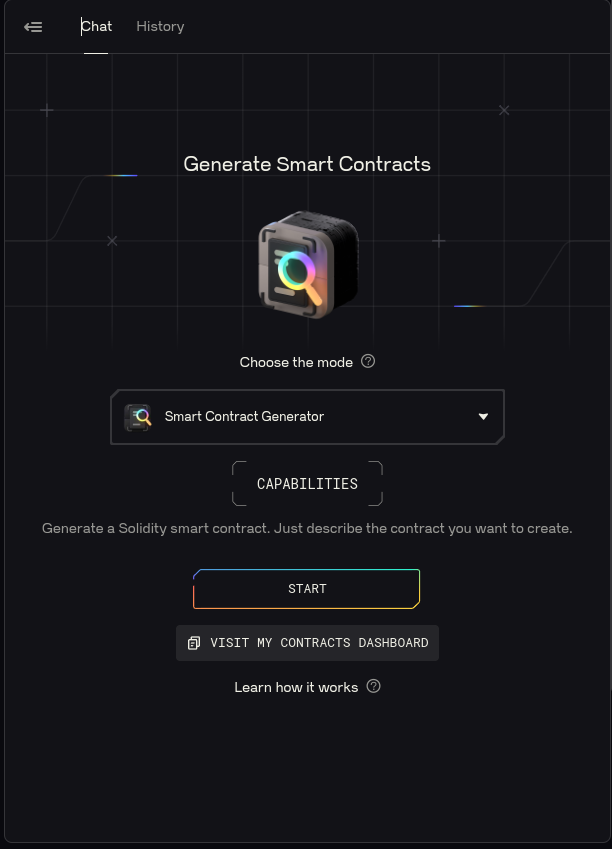
For this example we will choose the ‘Smart Contract Generator’.
Select ‘Start’ to continue with this AI chatbot.
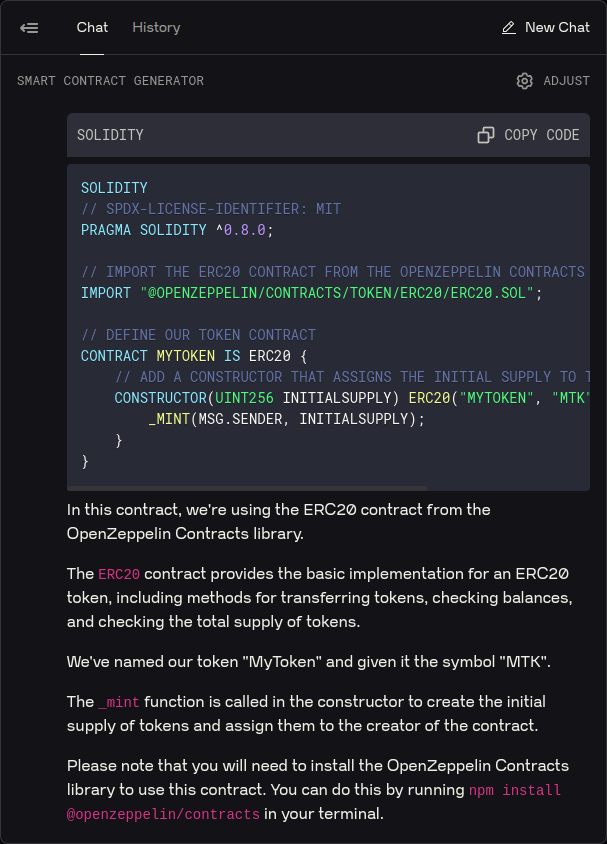
Click ‘Generate a basic token’ to create the smart contract code for a basic token.
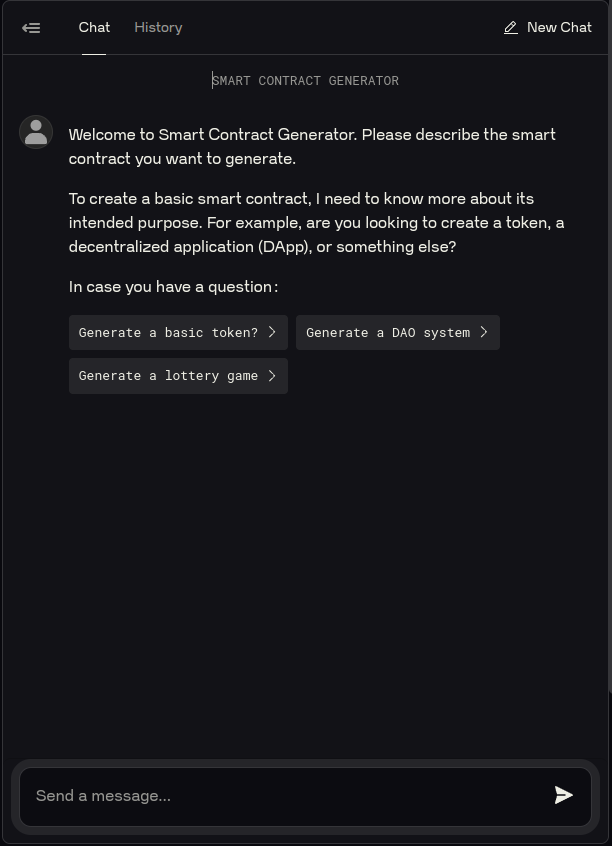
The AI will generate the smart contract code and an explanation of the code so you can modify it to meet your needs. The initial supply will be specified when you deploy the contract as a constructor parameter and you can tell the AI what name, symbol and any custom functions you would like to add.
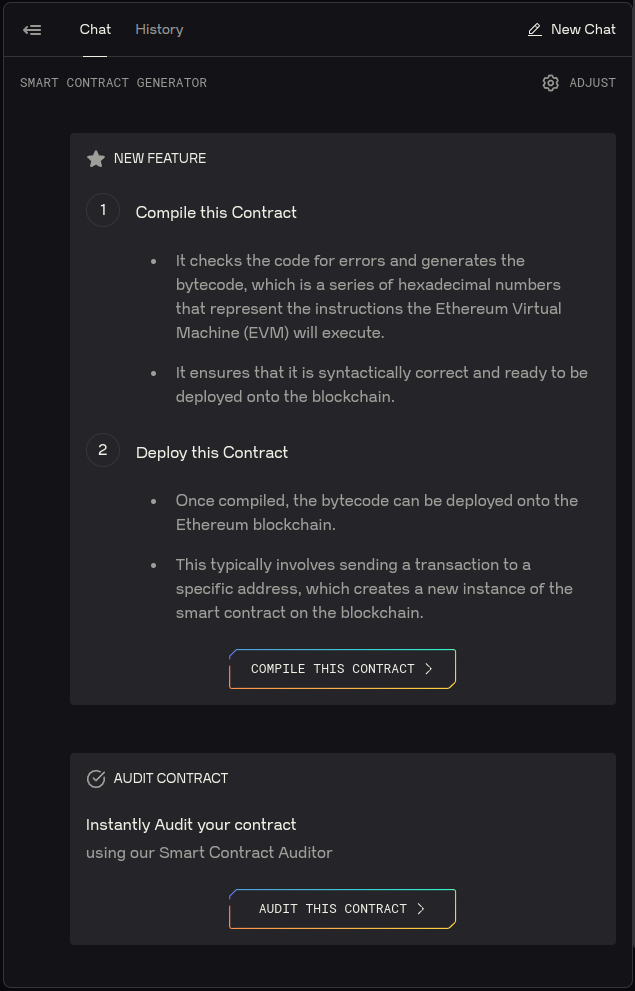
You can use the AI to compile the contract for you or audit the code to make sure there are no vulnerabilities in your code.
Click ‘Compile this contract’ to compile the smart contract into bytecode that can be deployed onto the blockchain.
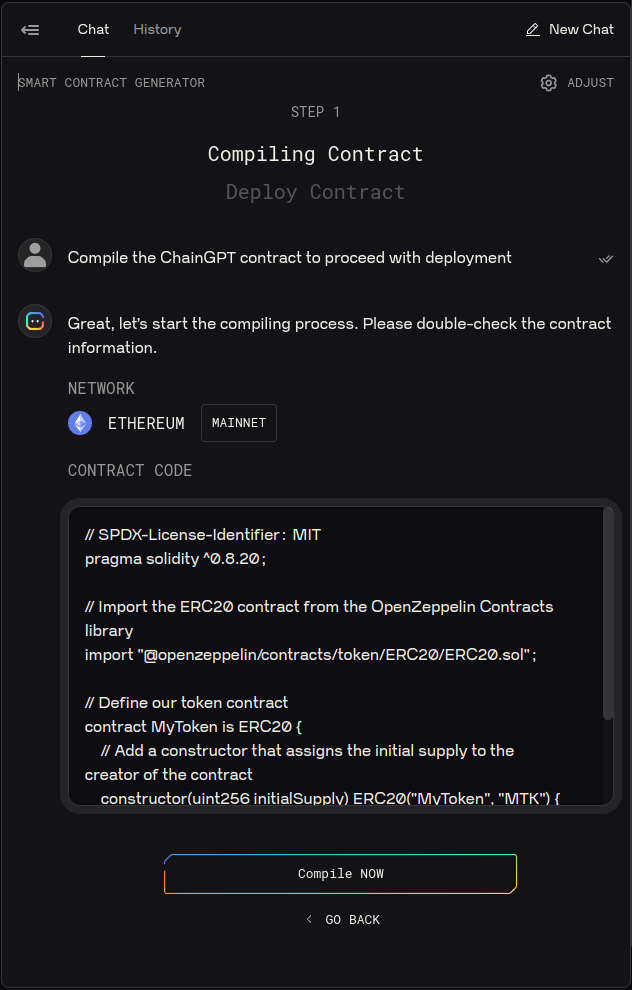
Review the code and network before you are ready to compile the smart contract.
Click ‘Compile now’ to continue.
Depending on the code of your smart contract, you will be prompted to enter the initial supply of the token then click ‘Deploy now’ when you are ready.
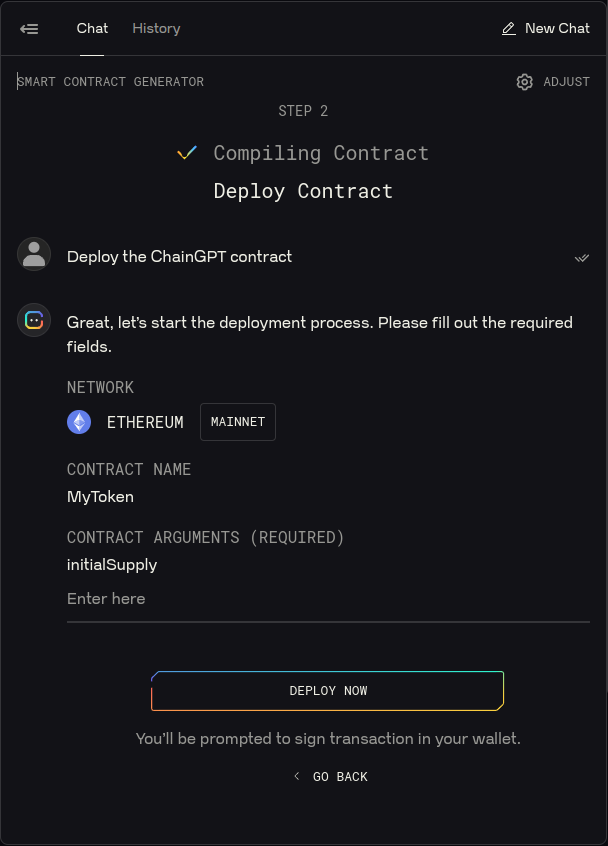
Confirm the transaction on the Enkrypt pop up by selecting ‘Send’.

Congratulations, your token is now published on the blockchain!
You can click the ‘Etherscan’ link to view the token on the blockchain explorer.
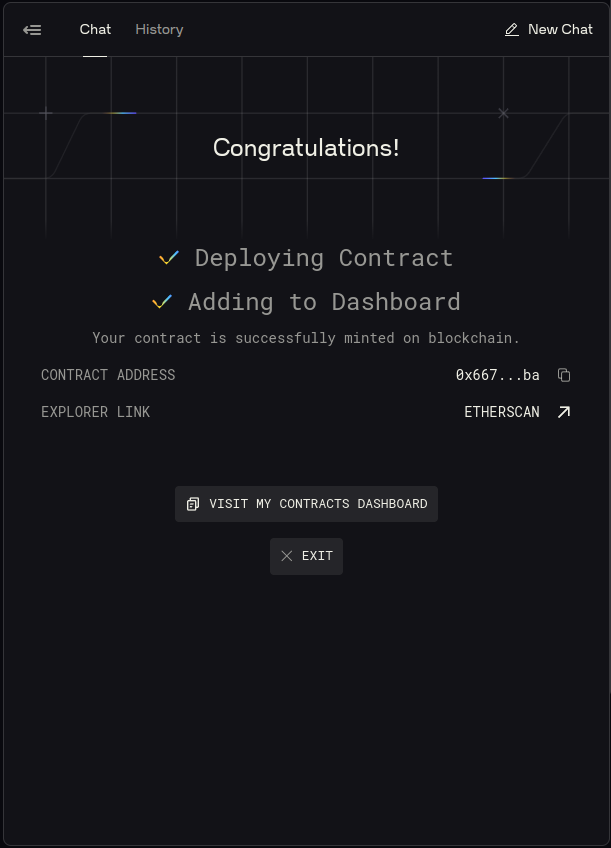
You should also see your token in your Enkrypt wallet!

Use AI to Create an NFT
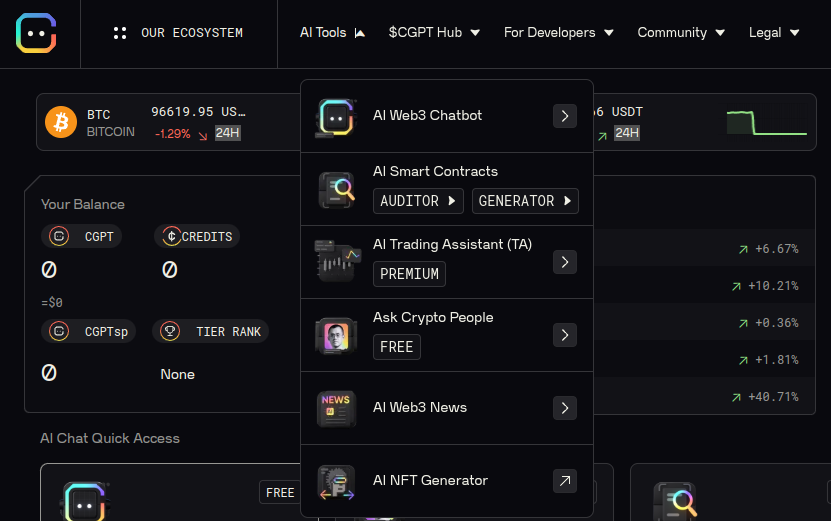
Click on the ‘AI Tools’ dropdown on the navigation bar at the top of the home page then select ‘AI NFT Generator’.
You will be brought to the AI NFT Generator page. You may need to connect your wallet again, it will follow the same steps as detailed above.
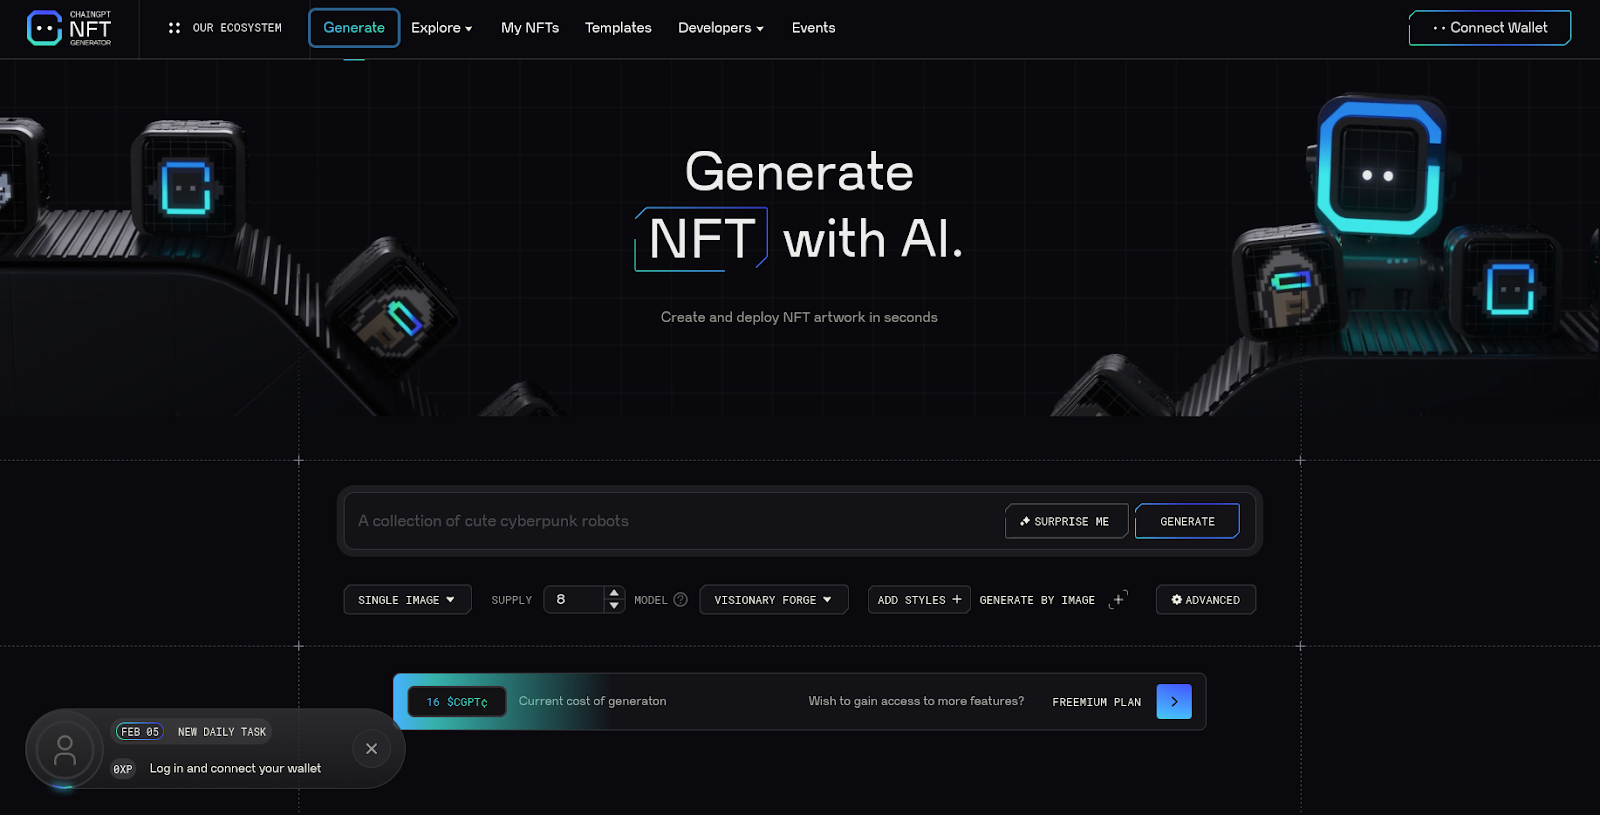
Here you can enter a prompt or click ‘Surprise me’ to generate a random NFT collection.
You can choose to generate a single image NFT or a Multi-NFT collection. We will use the Multi-NFT Collection for this example.

Enter the supply and select the model you would like to use.
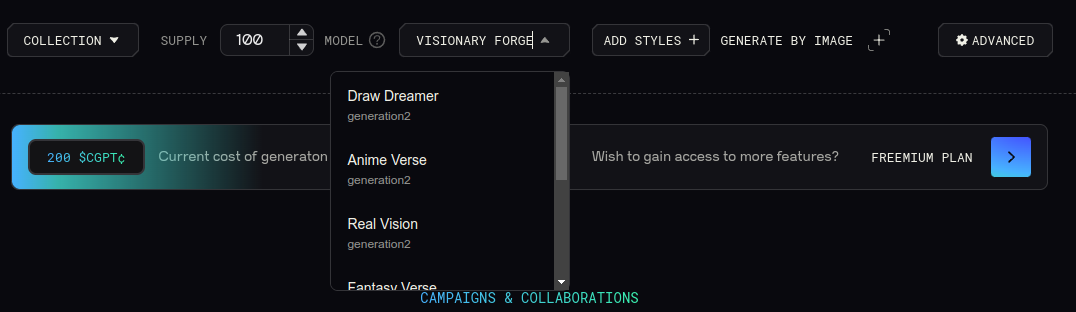
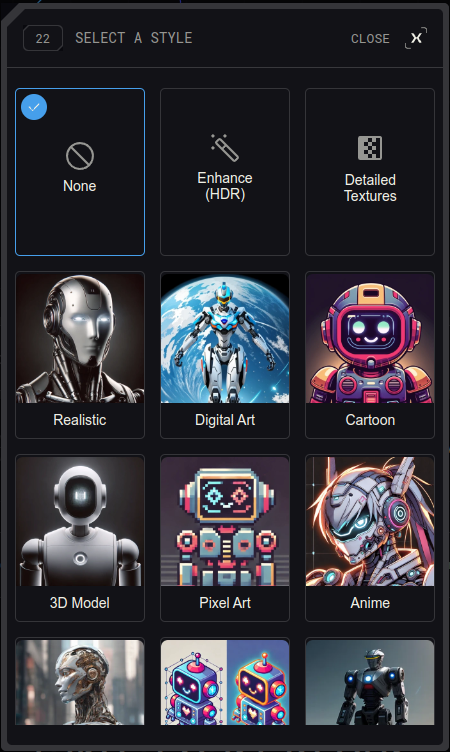
You can click ‘Add Styles’ to add a style to your NFT collection.
You can click ‘Advanced’ to change the aspect ratio, upscaling, traits and even a negative prompt, which will guide the AI to not include things in the image.
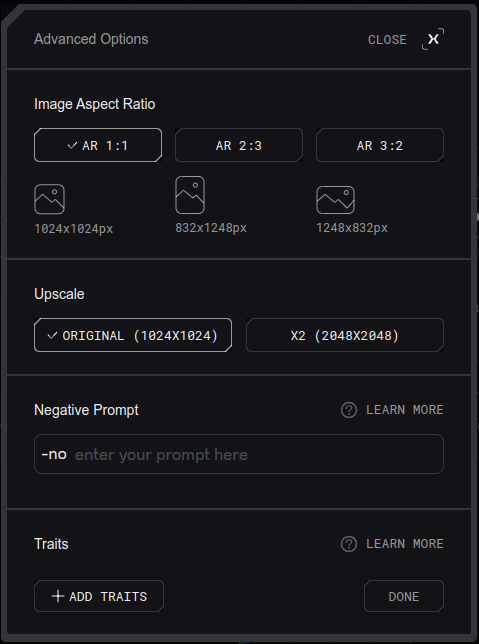
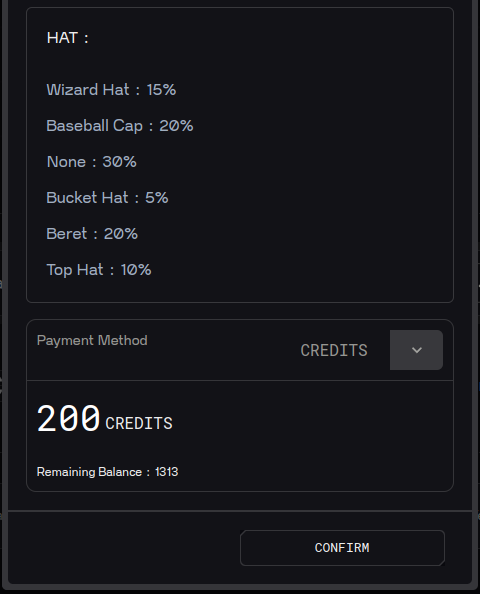
Clicking ‘Add Traits’ will allow you to add some traits along with their rarity percentages.

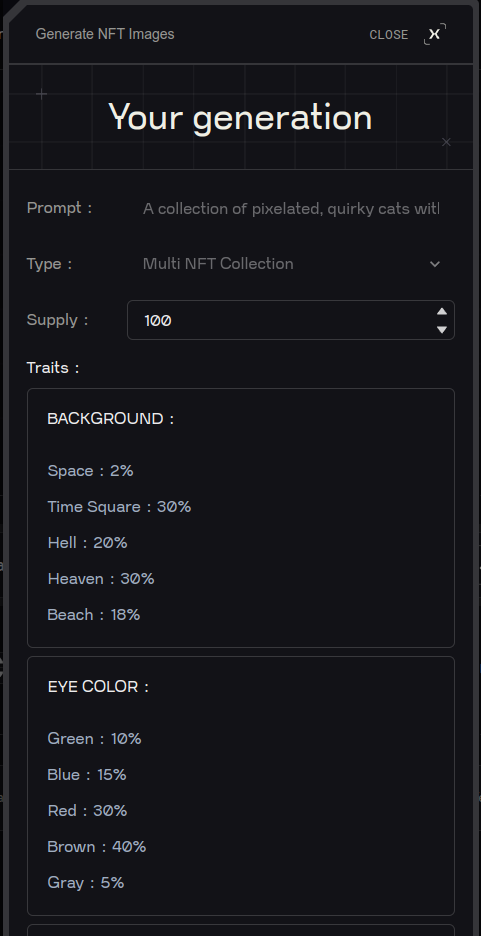
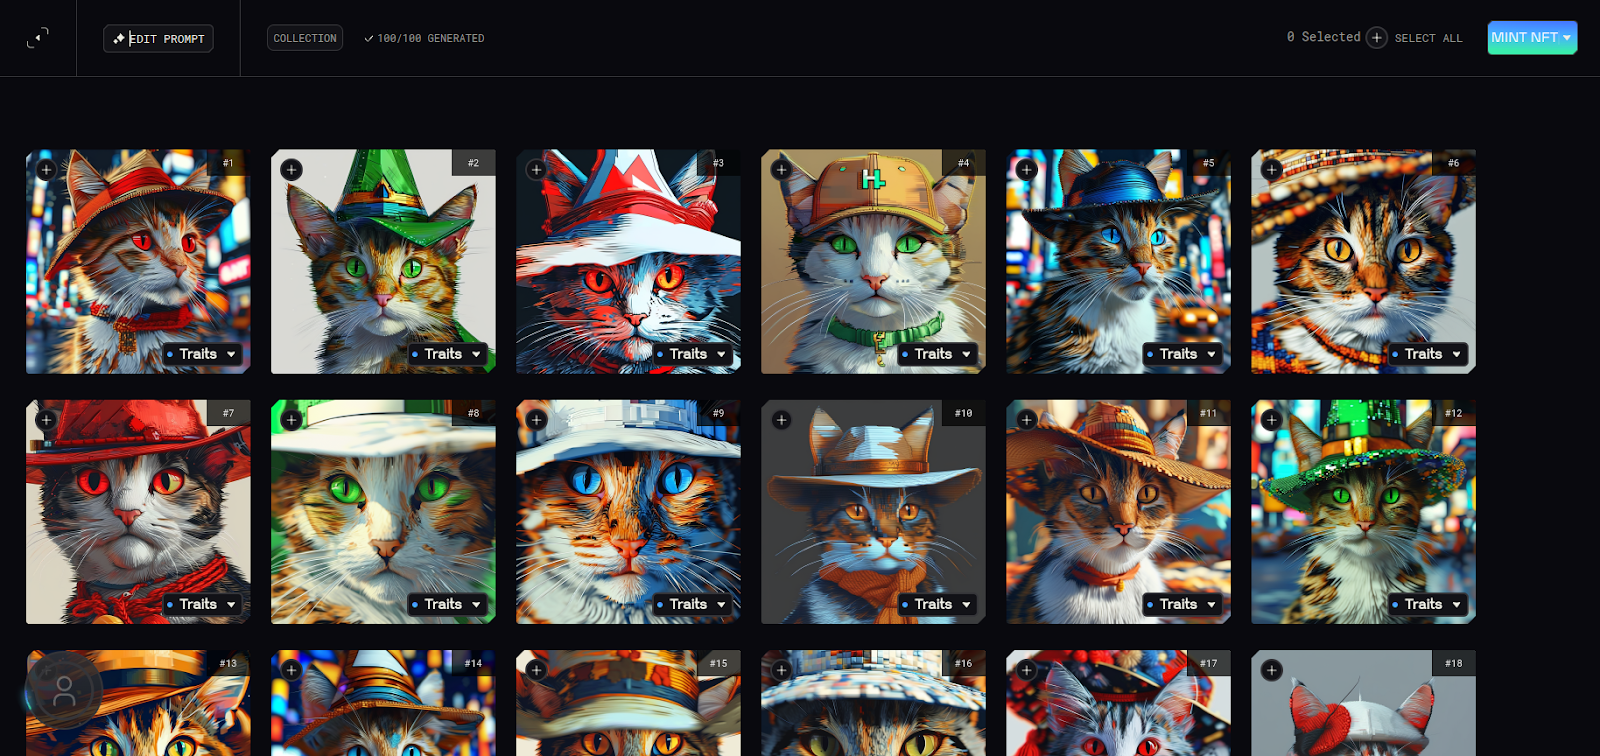
When you are ready to generate your NFTs, click ‘Generate’.

Review your NFT details then click ‘Confirm’ at the bottom of the pop up.
Congratulations, you have created your NFTs and can now choose to mint your NFTs at the top right of the page!
Thank you for checking out our guide on How to use AI to Create Tokens and NFTs with Enkrypt! Don't forget to download Enkrypt for a seamless web3 multichain wallet experience. We would love to hear from you on our social media about any guide suggestions you have for the future. Also, if you enjoy using mobile cryptocurrency wallets, give our MEW Mobile app a try, it's available on both iOS and Android platforms!