
How to Bridge to Solana using Enkrypt
You don't need to use a centralized exchange in order to go cross-chain. Learn how to bridge to Solana in our guide!

Get your Ethereum assets onto Solana to start using web3 with lower fees
Enkrypt is a multichain, non-custodial, and open-source web3 browser wallet built by the team behind MEW (MyEtherWallet). With Enkrypt, users and developers can generate accounts, manage tokens and NFTs, and interact with DApps on Solana, as well as EVM, Substrate and Bitcoin chains. Follow the instructions in this guide in order to bridge to Solana!
Like ETH on Ethereum, SOL also has a native currency, SOL, that you need to pay for network fees. However, the gas fees are much lower and transactions are faster than on the Ethereum mainnet. You will need to spend some crypto in Ethereum fees initially to bridge your assets to SOL, but once you do that, you will be able to enjoy very low-fee transactions going forward.
To start trading tokens on SOL instead of Ethereum, bridge your assets to the Solana network.
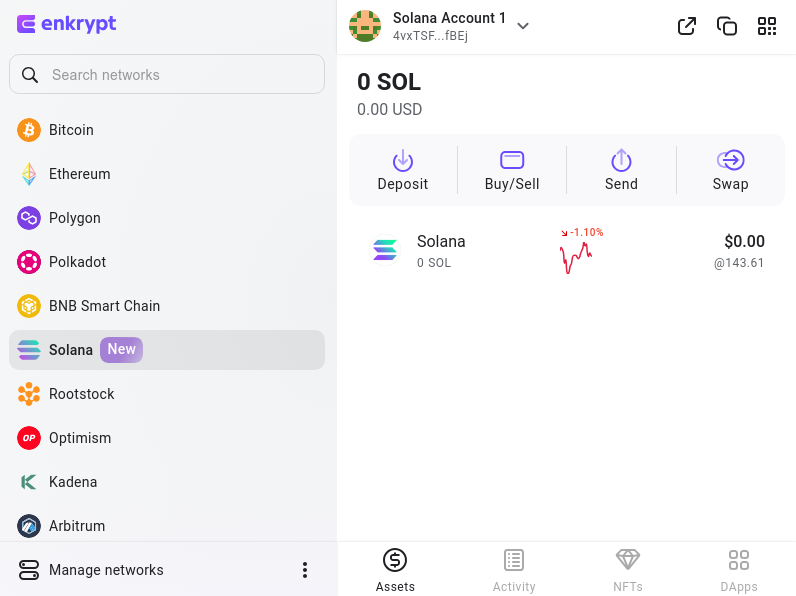
Unlock your Enkrypt wallet then select the ‘Solana’ network in the network menu.
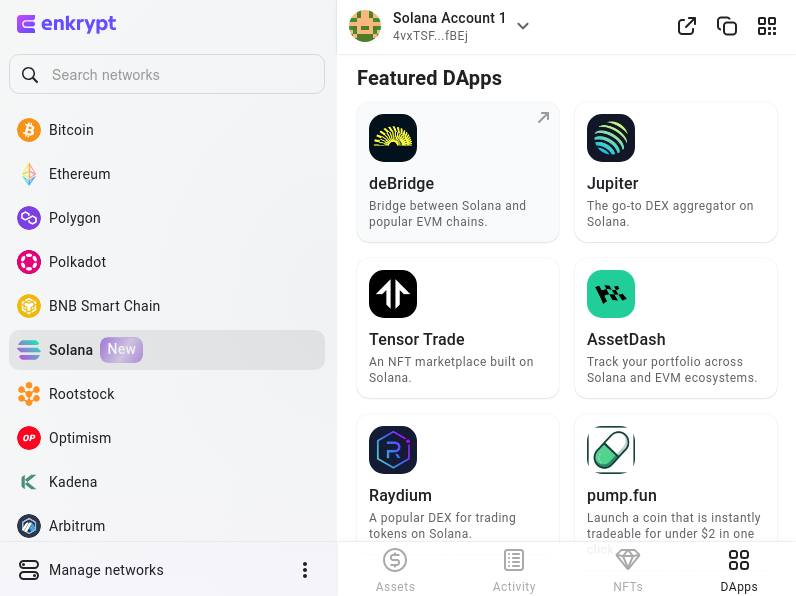
Select ‘DApps’ on the bottom right corner then select ‘deBridge’.
Disclaimer: Keep in mind deBridge is a third-party DApp and is not affiliated with MEW in any way. Bridging assets from network to network involves some inherent risk. Please do your research and proceed at your own discretion.
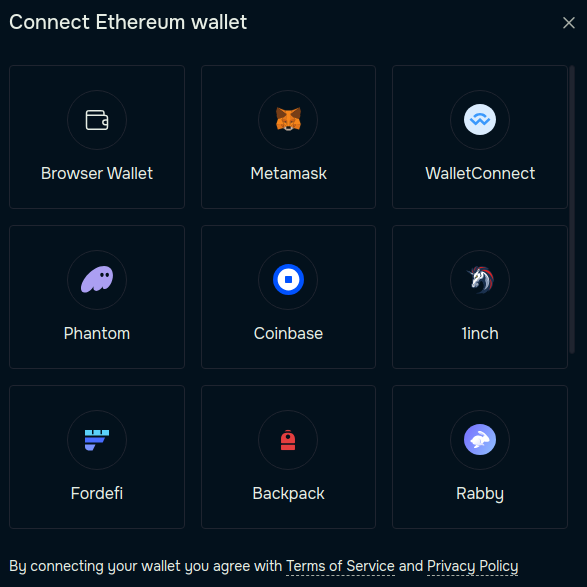
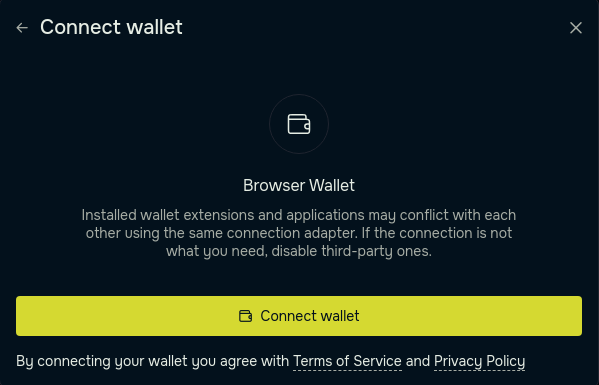
Now you should be on deBridge’s website. Select ‘Connect wallet’ to connect your Enkrypt wallet to the DApp.

Select the ‘Browser Wallet’ option.
The pop up should change, select ‘Connect wallet’.
On the Enkrypt pop up, select the account you want to connect with then select ‘Connect’.
Note: Because we are bridging from Ethereum to Solana, we are connecting with an Ethereum account here.

Your wallet should be connected now.
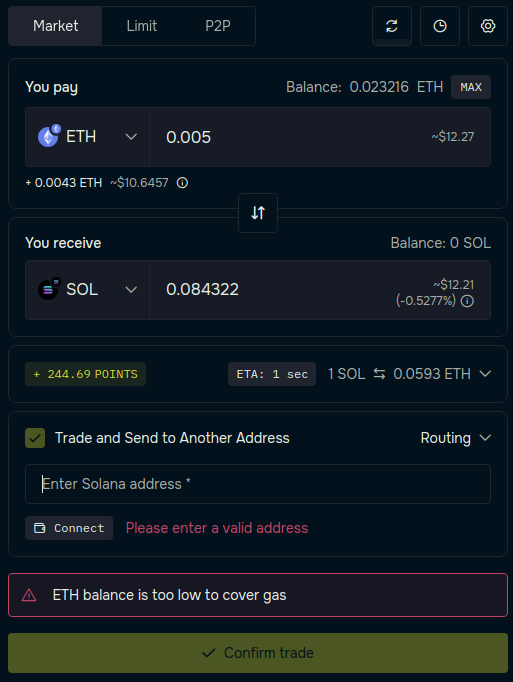
You can select the token you would like to bridge by selecting the ‘You pay’ dropdown.

Here you can select which network and token you want to send.
For this example, we will choose Ethereum and ETH.

You can select the token you would like to receive by selecting the ‘You receive’ dropdown.
Here you can select the token you would like to receive.
For this example we will choose Solana and the SOL coin.
Enter the amount you would like to bridge.
Open Enkrypt and select the Solana network then copy your address by selecting the Copy icon.

Paste your address into the Solana address box then select ‘Confirm trade’.

You may see a Terms & Conditions agreement. Once you are done reading it, select ‘Sign and proceed’.

On the Enkrypt pop up, sign the message by clicking the ‘Sign’ button.

Confirm the bridge by clicking ‘Send’ on the Enkrypt pop up.

You should see a pop up at the bottom of right of the page showing your order has been created.

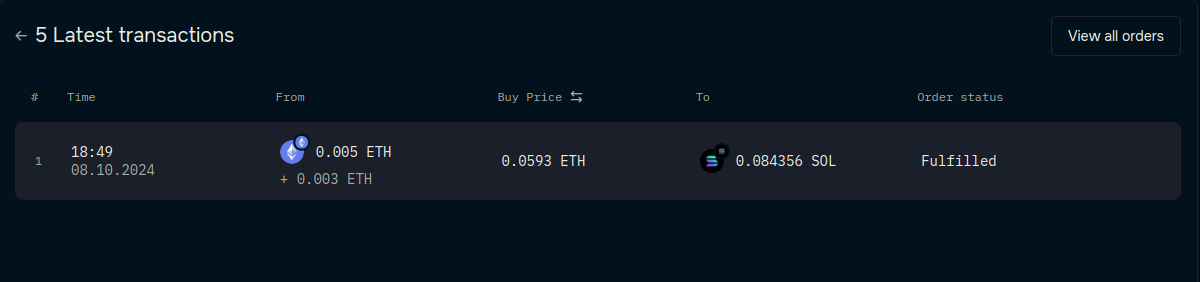
To view the status of your order you can click the clock icon at the top right of the trading module.

Once your ‘Order status’ says ‘Fulfilled’ you should have your SOL in your Solana wallet.
You can open your Enkrypt wallet then select the Solana network to see your SOL in your wallet.

Now you are ready to swap on the Solana network - see our guide here.
Thank you for checking out our guide on bridging your tokens to Solana with Enkrypt! Don't forget to download Enkrypt for a seamless web3 multichain wallet experience. We would love to hear from you on our social media about any guide suggestions you have for the future. Also, if you enjoy using mobile cryptocurrency wallets, give our MEW Mobile wallet app a try, it's available on both iOS and Android platforms!