
Connect to MegaETH using Enkrypt
MegaETH is an Ethereum layer 2 ideal for onchain gaming and defi. Learn how to connect to MegaETH here!

Get your Ethereum assets onto MegaETH to start using web3 with lower fees
Enkrypt is a multichain, non-custodial, and open-source web3 browser wallet built by the team behind MEW (MyEtherWallet). With Enkrypt, users and developers can generate accounts, manage tokens and NFTs, and interact with DApps on MegaETH, as well as Solana, Bitcoin, Substrate and EVM chains. Follow the instructions in this guide in order to use MegaETH on Enkrypt!
MegaETH is an Ethereum Layer 2 network designed for real-time performance, offering millisecond-level block times and high transaction throughput while remaining fully EVM-compatible. It uses a specialized architecture with parallel execution and node roles to achieve speed and scalability, making it ideal for applications like gaming and DeFi that need instant responsiveness.
Layer 2s and scalability networks like MegaETH are compatible with Ethereum, but you can't just send assets from Ethereum to MegaETH in a regular transaction. The way to transfer assets between Ethereum and Layer 2s is through applications called bridges.
To start using the MegaETH network instead of Ethereum, you will need to bridge your assets to MegaETH.
Add MegaETH Network
MegaETH is currently in testnet, we will add the MegaETH testnet in this example.
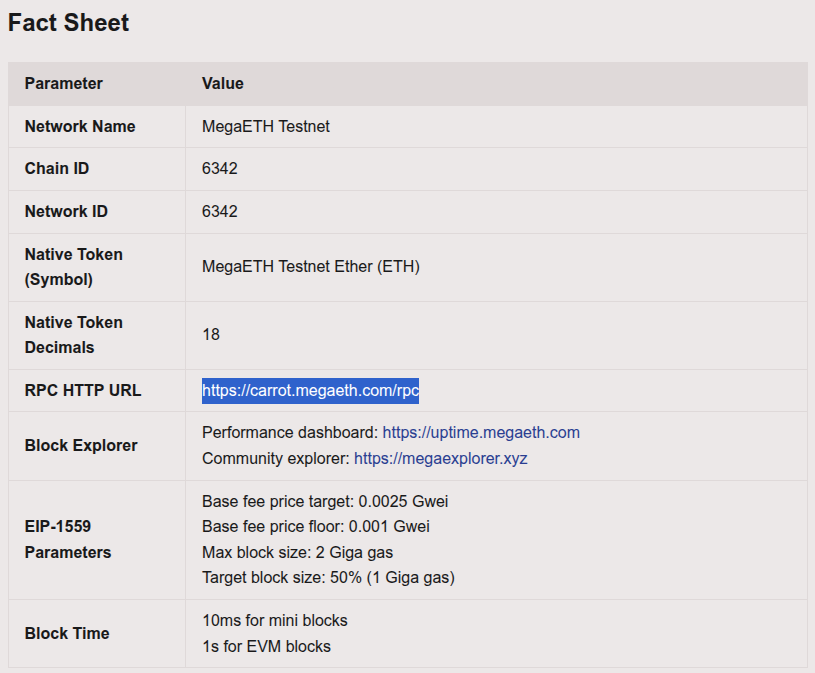
First, head to the MegaETH Documentation to view the RPC URL information.

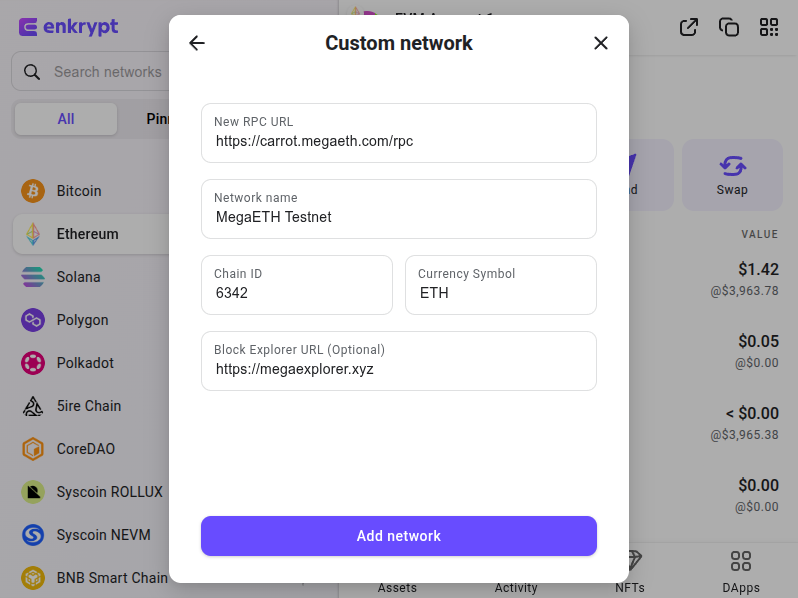
Copy the RPC HTTP URL from the MegaETH documentation.
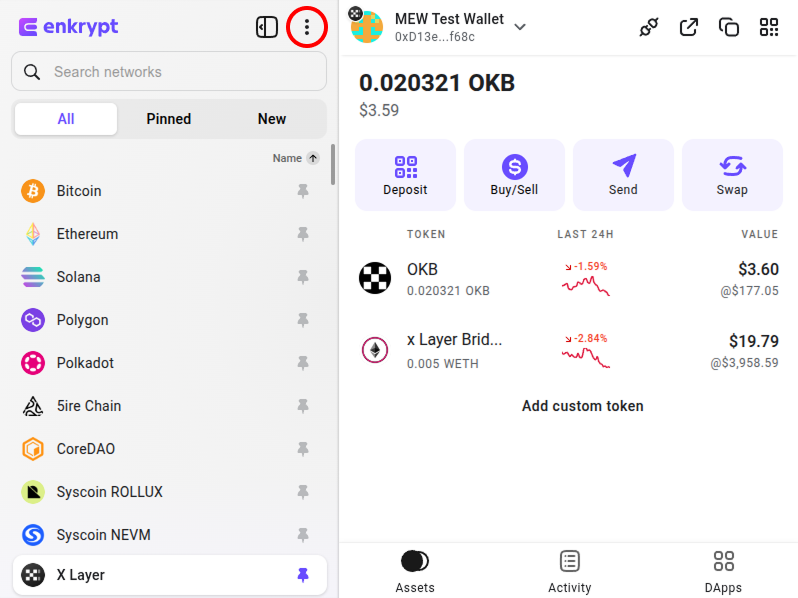
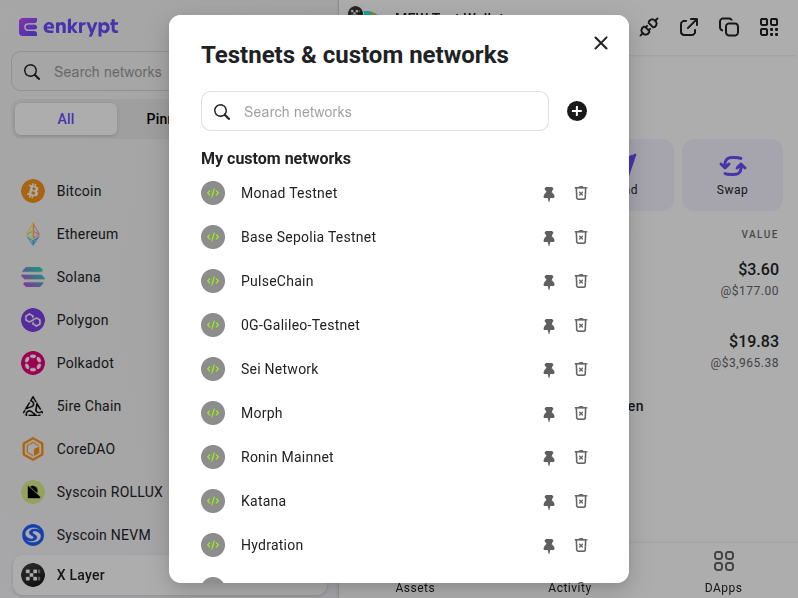
Then open and unlock your Enkrypt wallet then click the 3 dots at the top of Enkrypt.
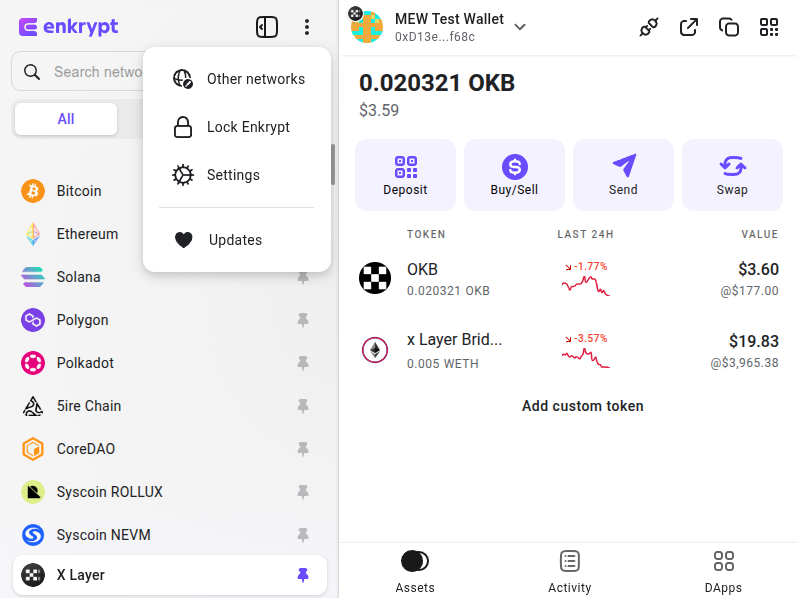
Click ‘Other networks’.
Click the ‘+’ sign to add the network.
Paste the RPC URL from the MegaETH documentation then click ‘Add network’.
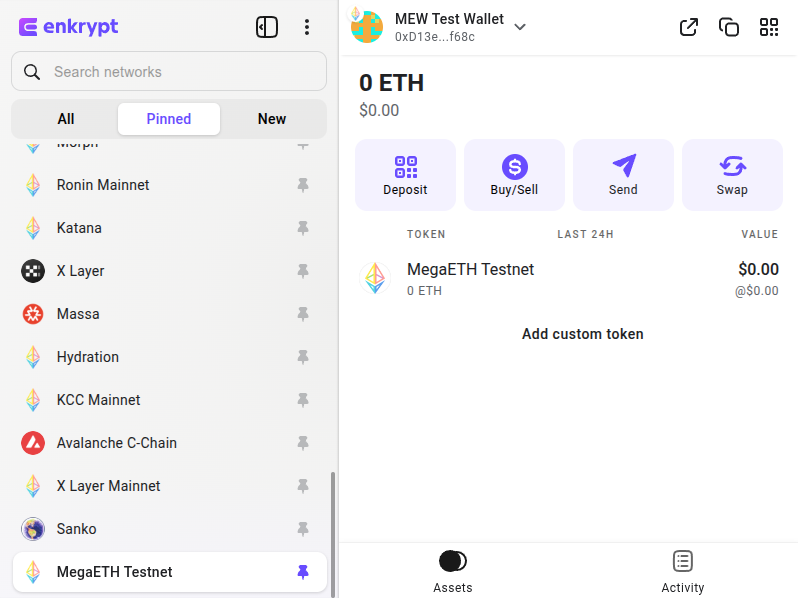
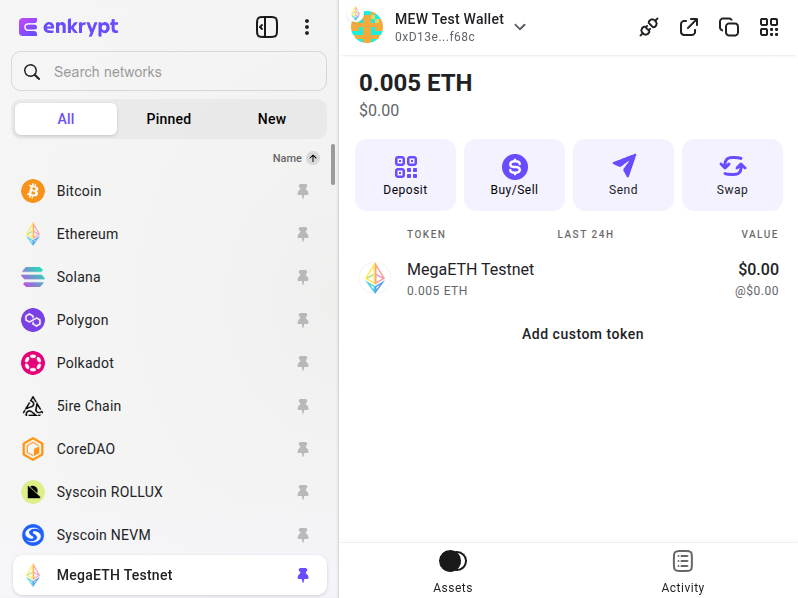
You should now see the MegaETH Testnet added to your ‘Pinned’ networks list.
Using Testnet Faucet
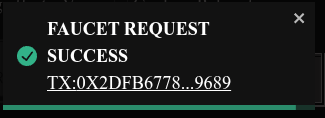
First, head to the MegaETH Testnet Faucet then enter your address, check the captcha box then click ‘Get Testnet ETH’.
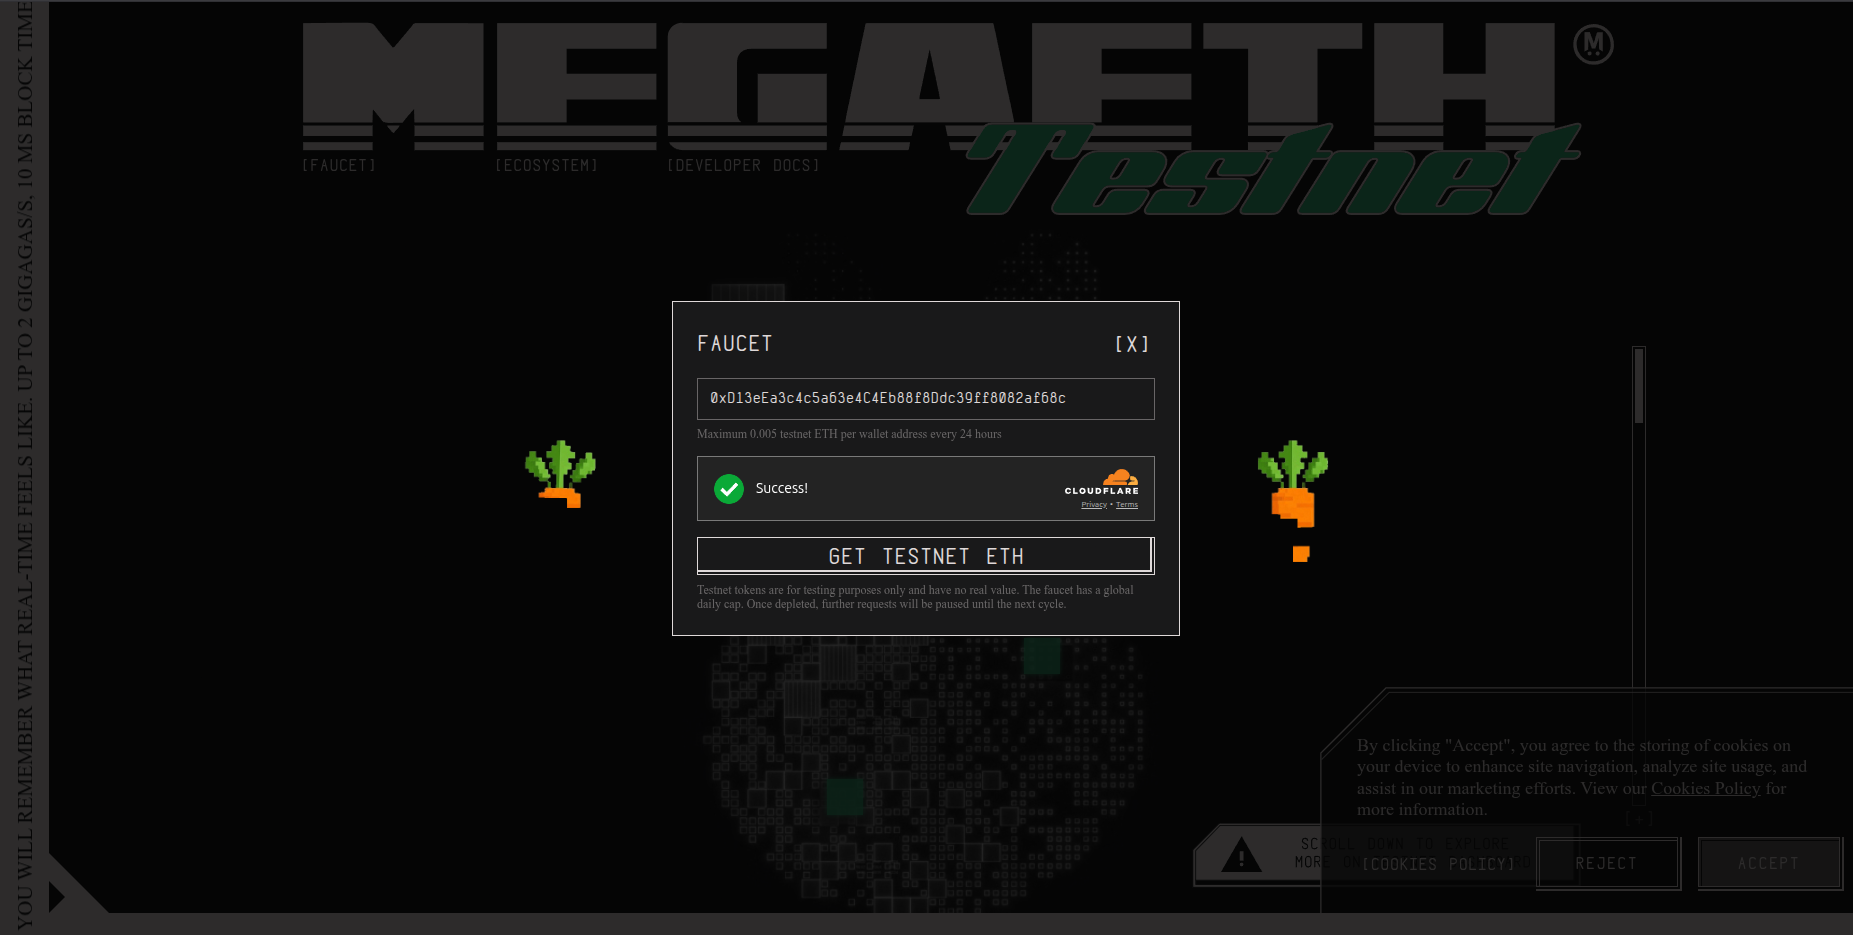
There will be a pop up showing your request and the transaction hash.
You should also see your ETH on the MegaETH Testnet in your Enkrypt wallet.
Exploring dApp Ecosystem
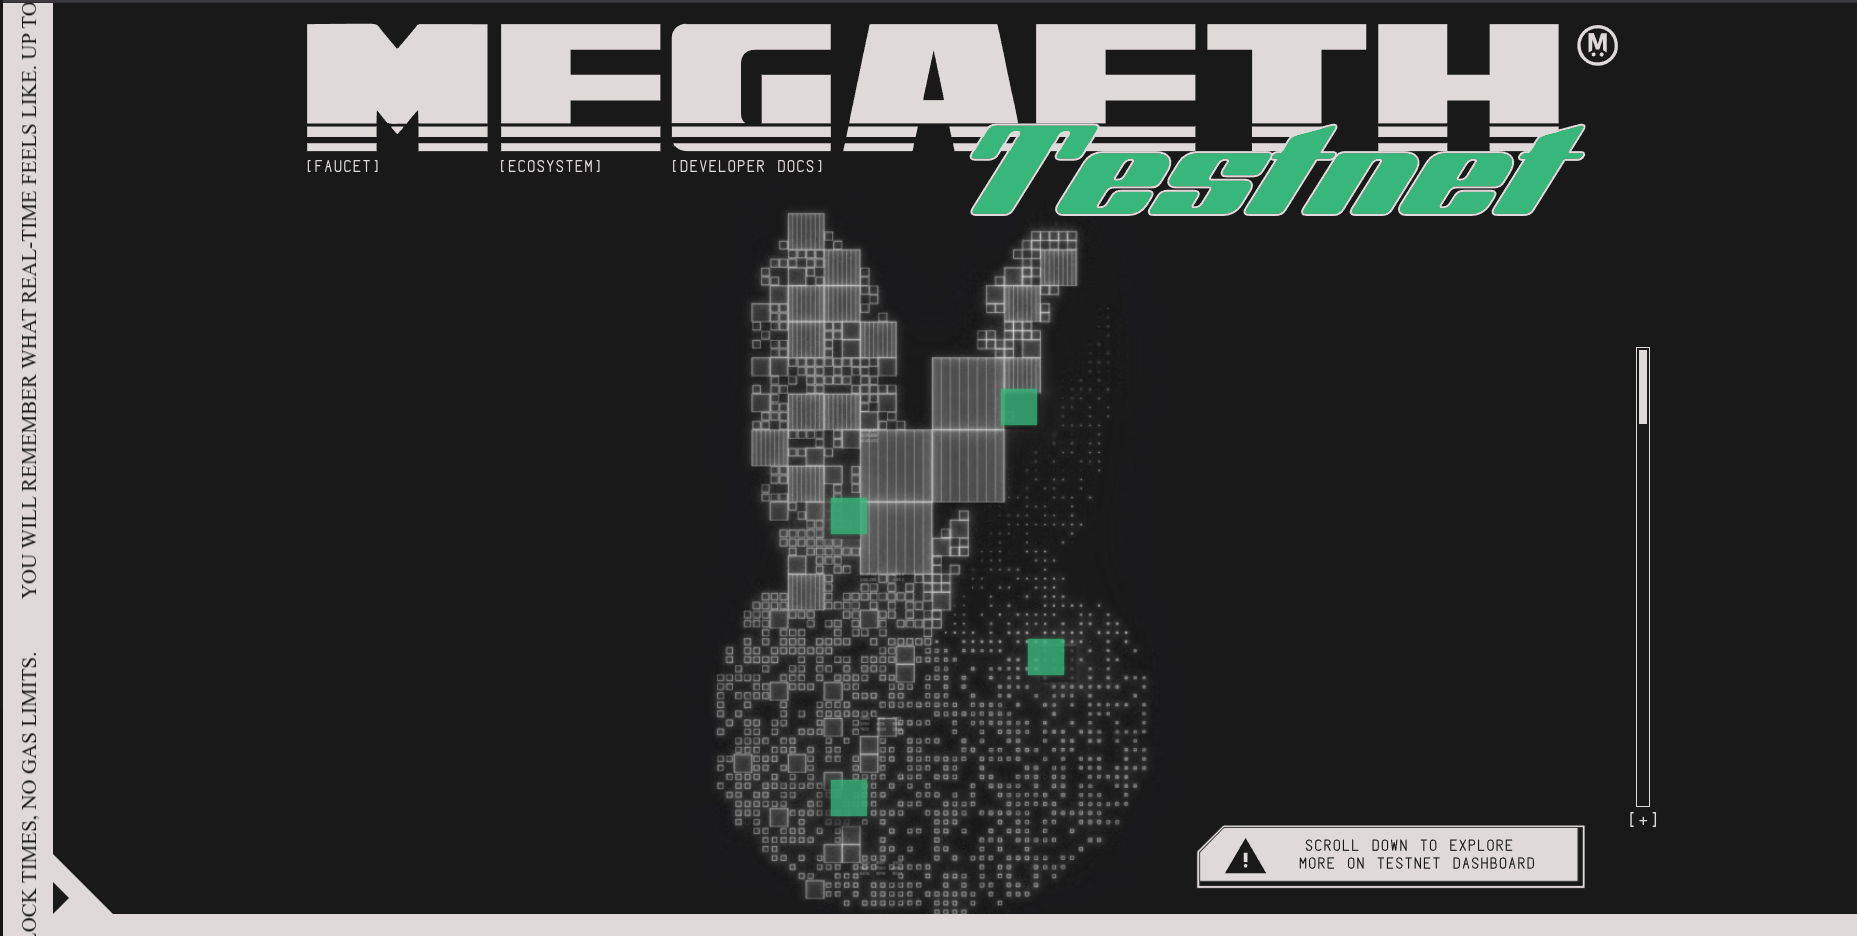
First, head over to MegaETH Testnet website then click the ‘Ecosystem’ option on the navigation menu or scroll down to the Ecosystem list.
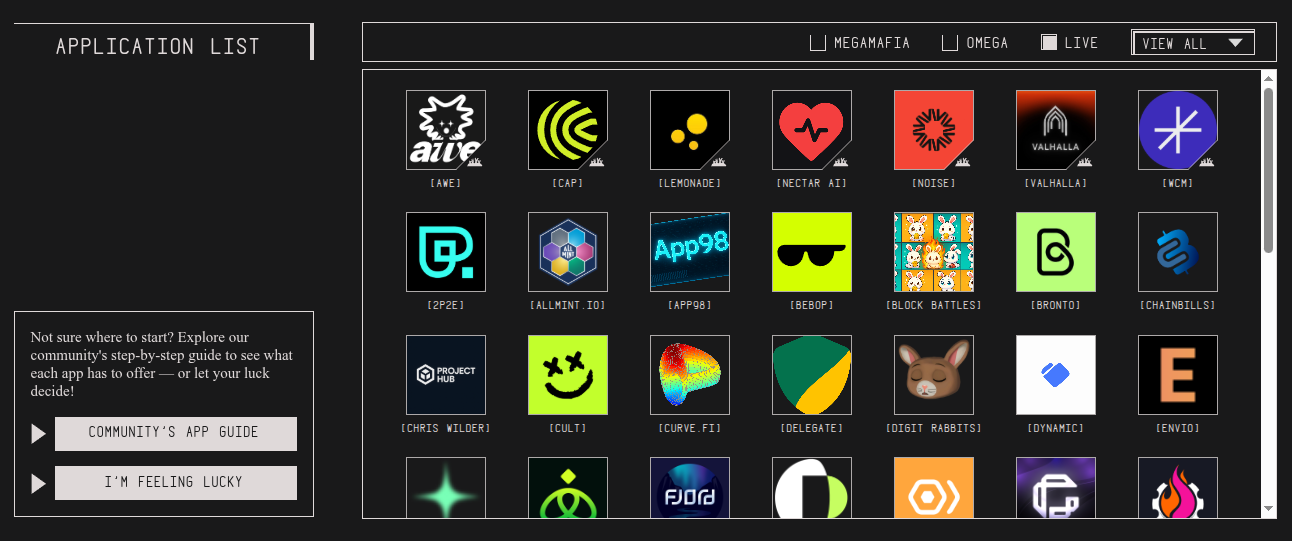
Here you can hover over the dApps in the list to see a brief overview of the dApp. Click on a dApp to go to their website. We will choose Bronto for this example.
Disclaimer: Keep in mind Bronto is a third-party DApp and is not affiliated with MEW in any way. Using DeFi involves some inherent risk. Please do your research and proceed at your own discretion.
Swapping Tokens
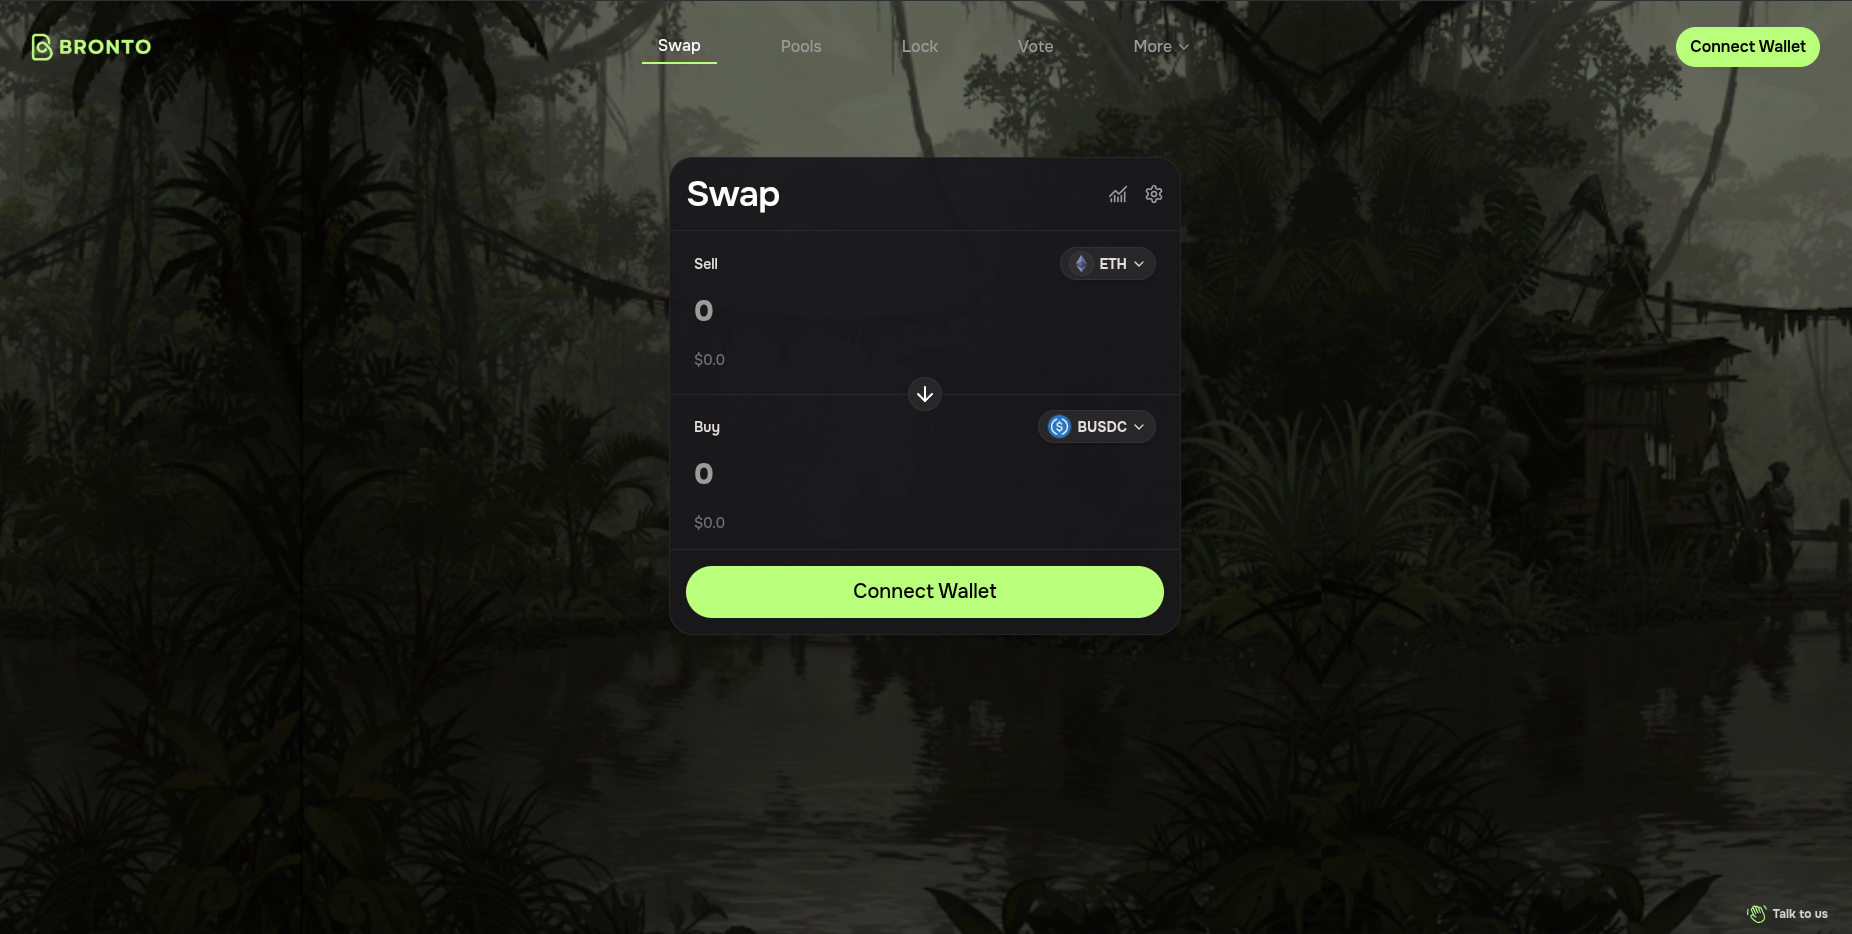
First, head to the Bronto dApp then click ‘Connect Wallet’.
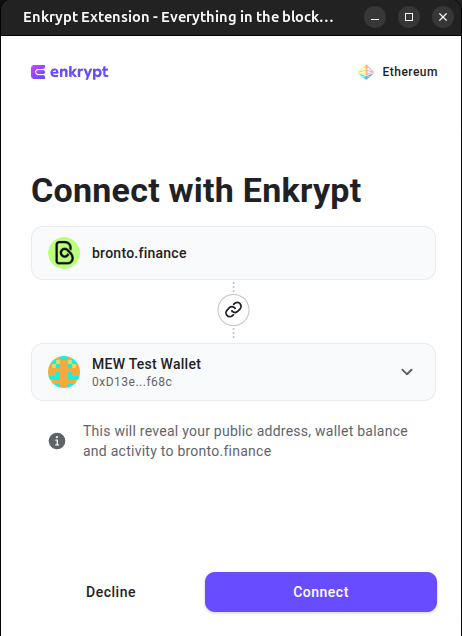
Select the ‘Enkrypt’ option.
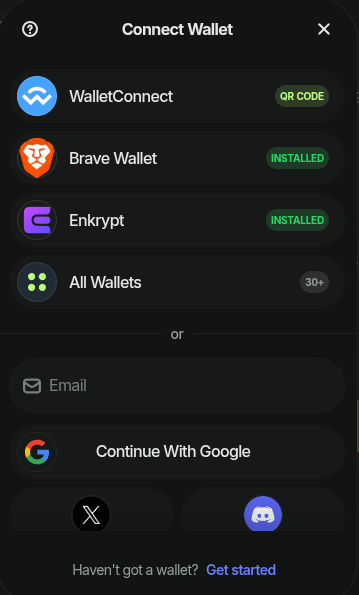
On the Enkrypt pop up, Select the wallet you want to use then click ‘Connect’.
On the swap form, click the Sell token dropdown to open the token list.

Select the token you want to swap. We will choose ETH for this example.
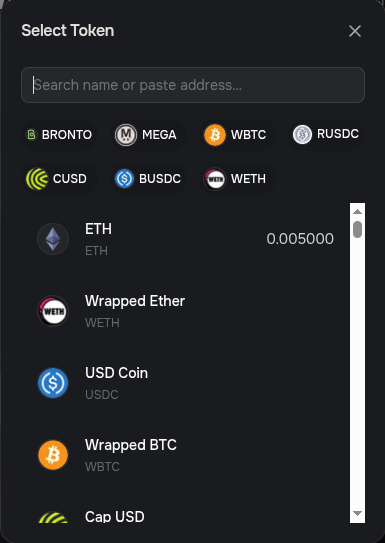
Click the Buy token dropdown to open the token list.
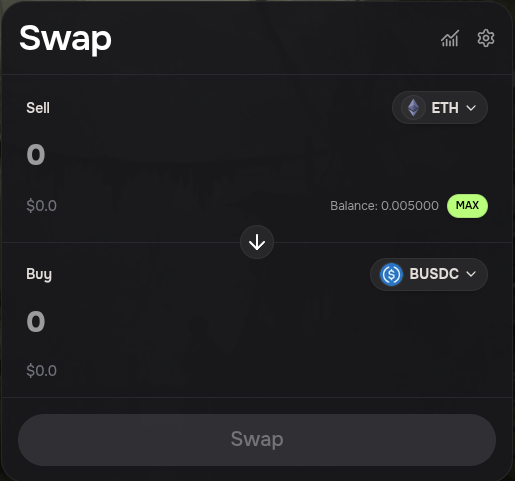
Select the token you want to receive. We will choose the USDC token for this example.

Enter the amount you want to swap then click ‘Swap’.

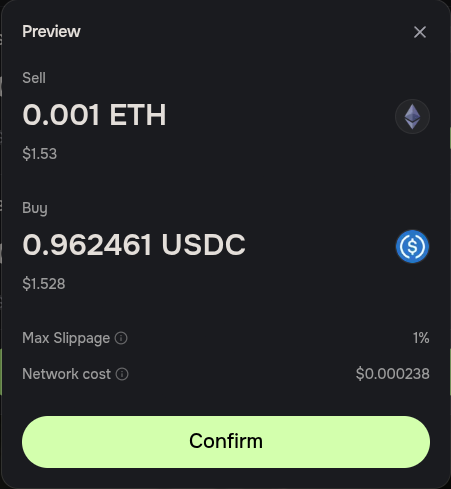
Review the swap details then click ‘Confirm’ to proceed with the swap.
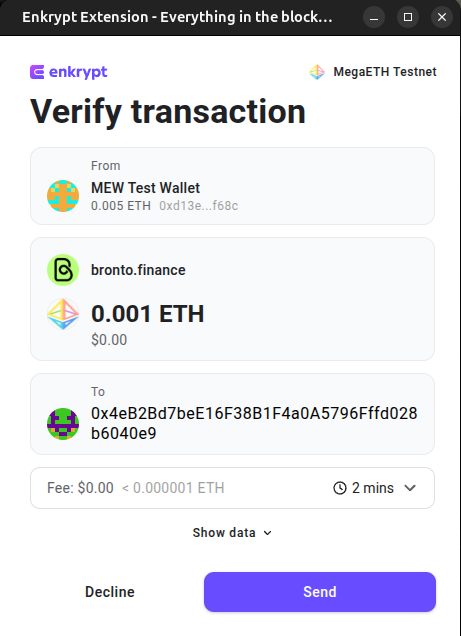
Since we are swapping from ETH, there will be 3 transactions that will need to be confirmed.
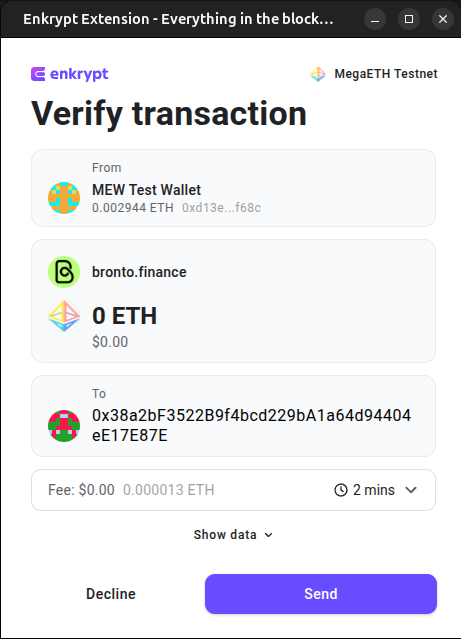
The first transaction will wrap ETH to Wrapped ETH (WETH). Confirm the transaction on the Enkrypt pop up by clicking the ‘Send’ button.
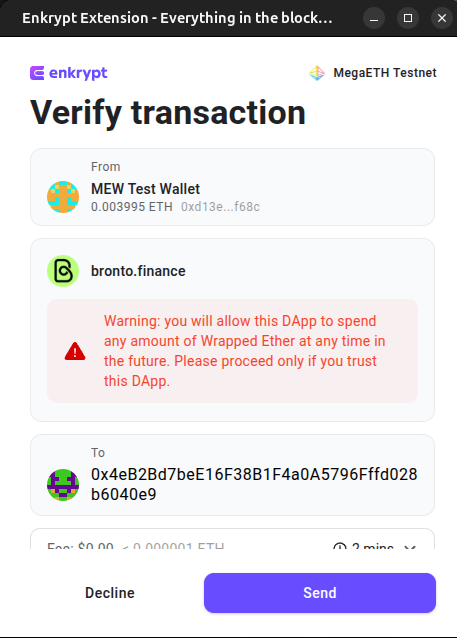
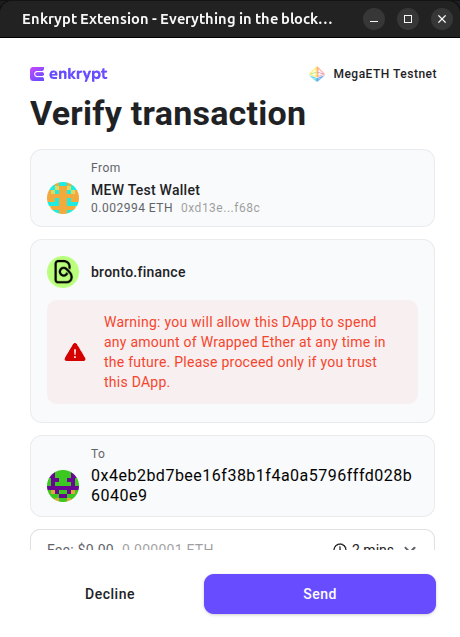
The second transaction is the approval to use our WETH tokens in the swap transaction.
Confirm the transaction on Enkrypt by clicking ‘Send’
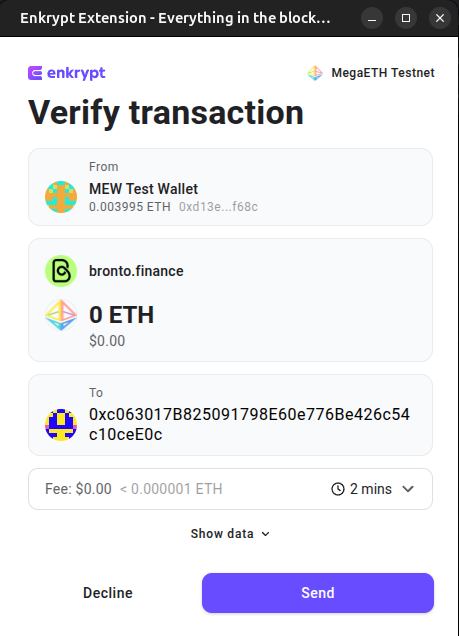
The last transaction will be the actual swap transaction.
On the Enkrypt pop up, click ‘Send’ to confirm the transaction.
Once the transaction is confirmed, you can view the tokens in your wallet but you may have to add the token as a custom token. To learn how to add a custom token you can follow this guide and the MegaETH Testnet Explorer.

Adding Liquidity
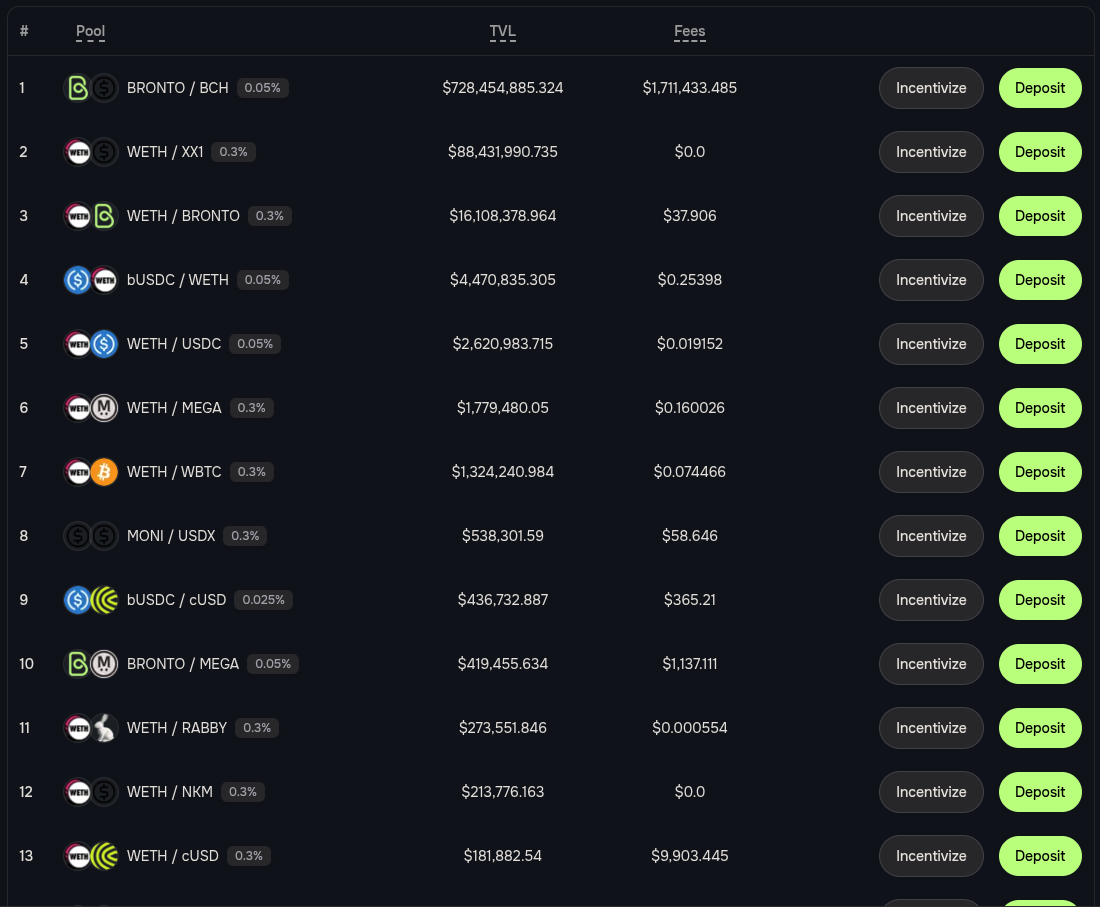
First, head to Bronto dApp then click ‘Pools’ in the navigation menu.

Select the liquidity pool you want to deposit your tokens into. We will choose the WETH/USDC liquidity pool for this example.
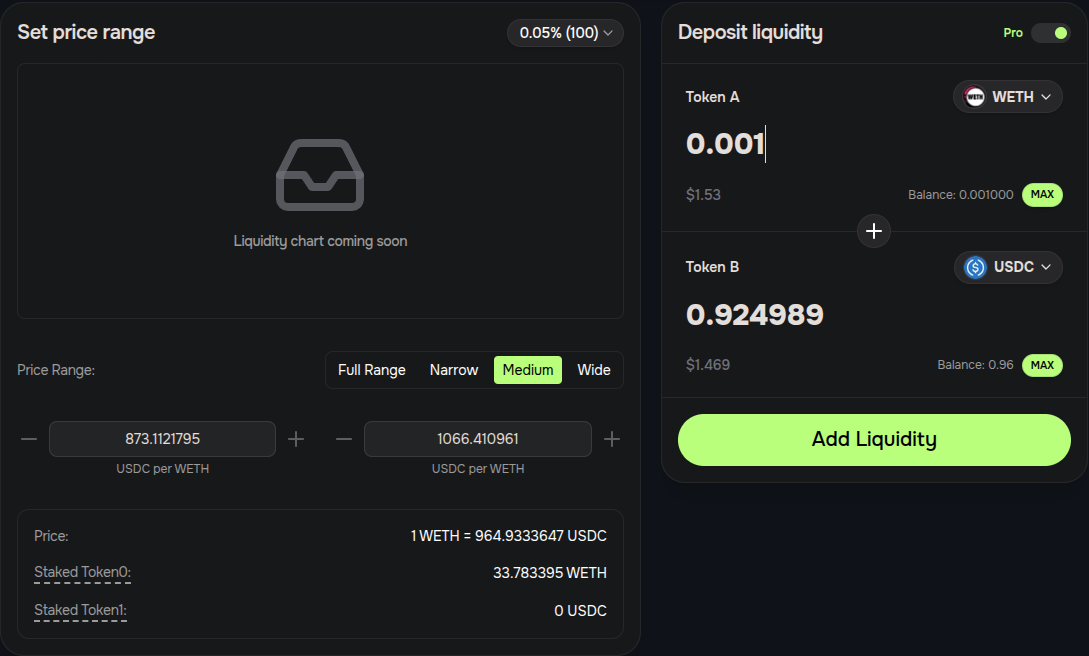
On the left side of the page you can set the price range, we will leave it on the default settings.
On the right side of the page, you can enter the amount you want to deposit into the pool then click ‘Add Liquidity’.
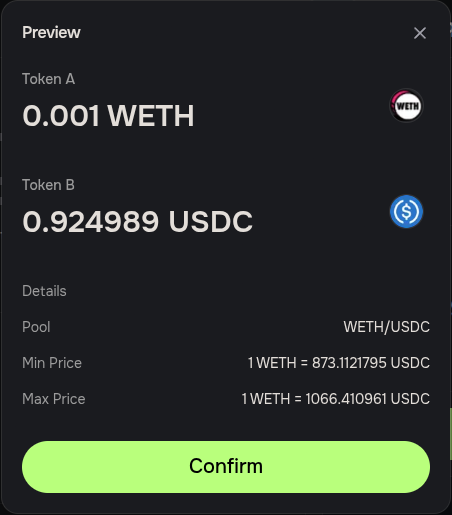
Review the deposit details then click ‘Confirm’.
We will need to approve the dApp to use our WETH. Confirm the transaction on the Enkrypt pop up by clicking ‘Send’.
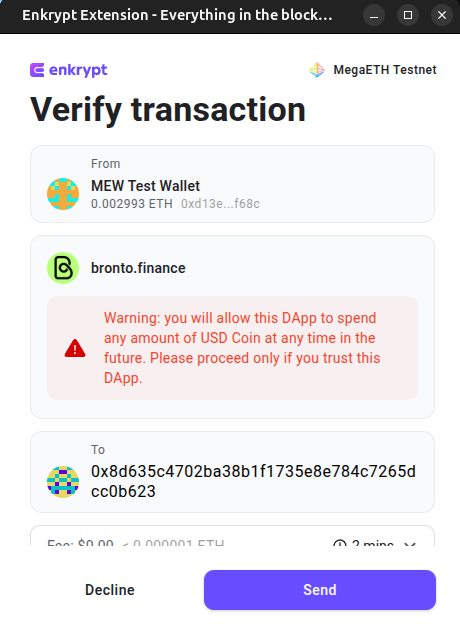
Next, we will need to approve the dApp to use our USDC tokens. Confirm the transaction on the Enkrypt pop up by clicking ‘Send’.
Finally, we can deposit our tokens into the liquidity pool. Confirm the transaction on the Enkrypt pop up by clicking ‘Send’.
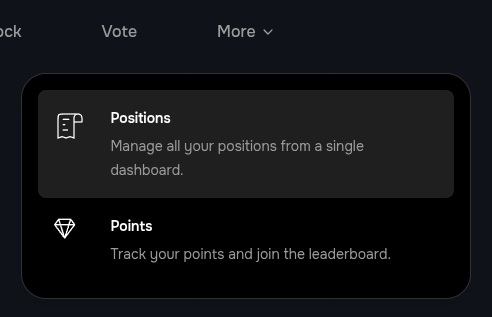
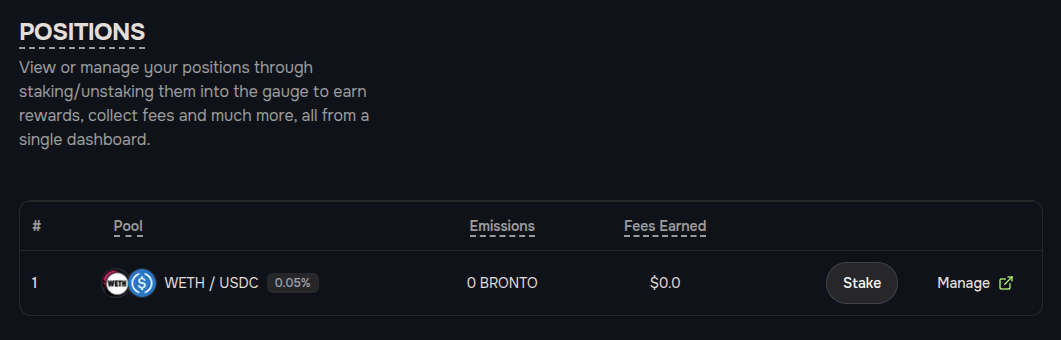
After the transaction is confirmed, you can view your position by clicking the ‘More’ dropdown in the navigation menu then select ‘Positions’.
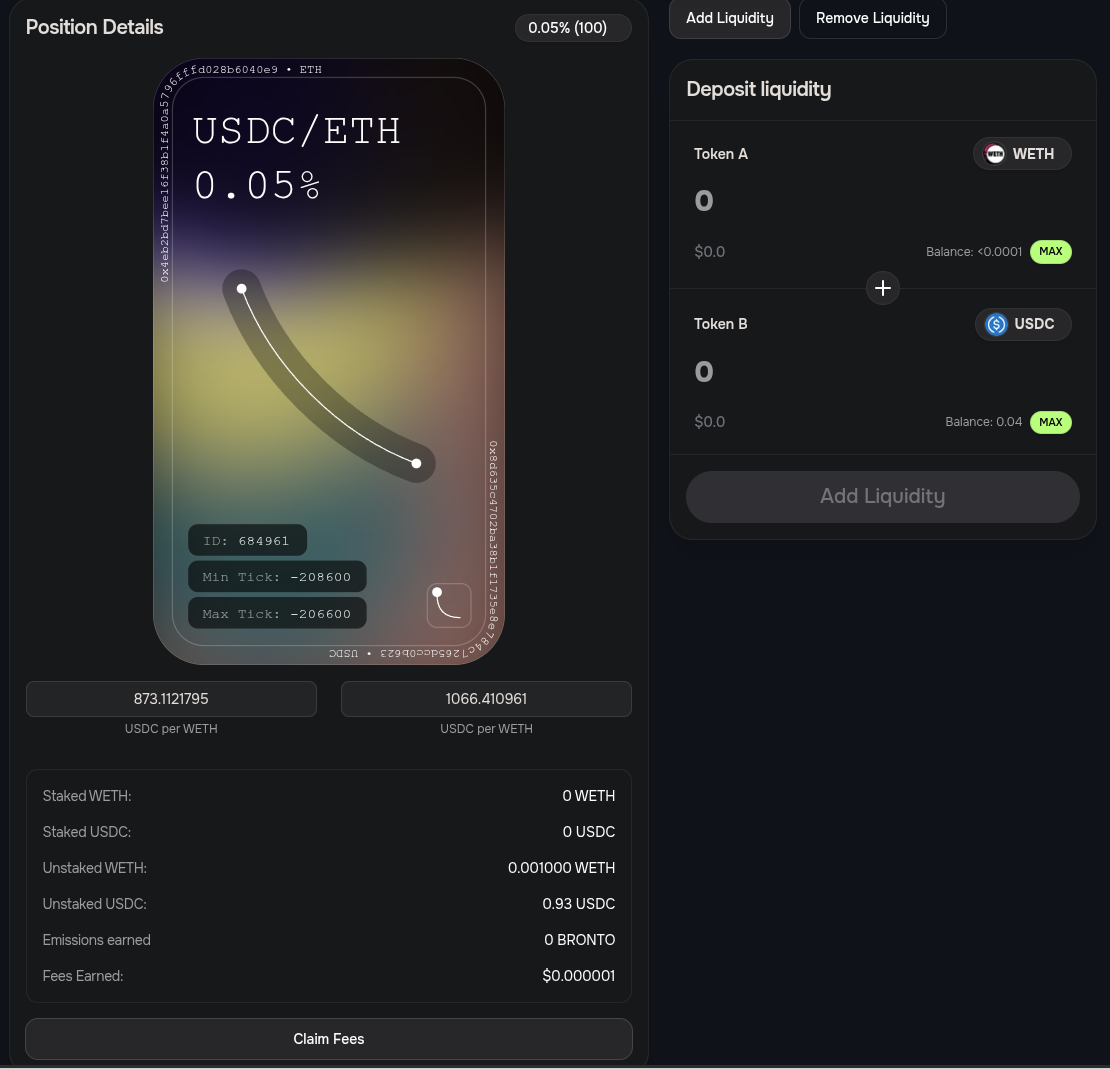
Here you can view your positions and manage your position by clicking ‘Manage’. We will click ‘Manage’ on the WETH/USDC pool.
Here you can add more liquidity, remove all or some of your liquidity or claim the fees earned so far.
Thank you for checking out our guide on How to use the MegaETH network with Enkrypt! Don't forget to download Enkrypt for a seamless web3 multichain wallet experience. We would love to hear from you on our social media about any guide suggestions you have for the future. Also, if you enjoy using mobile cryptocurrency wallets, give our MEW Mobile app a try, it's available on both iOS and Android platforms!